
This post may contain affiliate links, which means if you purchase from one of these links I will receive a commission. Please read my full privacy policy for more information.

ConvertKit is an email service provider for bloggers and online business owners. It packs a powerful punch with automations and triggers in an easy-to-understand interface. Unlike many of the other email service provider options out there, ConvertKit uses a simplistic interface making it easy to use even for those of us who aren’t very technical.
I’m going to teach you everything you need to know in my free series: Ultimate Beginner’s Guide to Building an Email List with ConvertKit.
Below you will find affiliate links. I am sharing these resources with you because they have helped me tremendously through my blogging journey. I do not recommend any products in this review that I do not use myself.
The Ultimate Beginner’s Guide to Building an Email List with ConvertKit includes:
- Email Marketing Tips for Beginners
- CovertKit Tutorial: Sequences vs. Broadcasts
- ConvertKit Tutorial: Automations <– this post
- ConvertKit Tutorial: Segments and Tags
- 7 Clever ConvertKit Automation Hacks
Ready? Okay, let’s dive in!
ConvertKit Tutorial: Automations
What is an Automation in ConvertKit?

An automation is a series of automated actions that you can set up in your ConvertKit dashboard. These automated actions are sometimes referred to as “triggers.”
Once an email subscriber takes a specific action on your email list, an event will trigger an automated action.
It might sound a little confusing at first, but let’s take a look at the different automation options offered. Once we break down the types of automations, I’ll show you an example of an automation I frequently use to tag people correctly on my list.
Types of Automation Triggers and Actions in ConvertKit
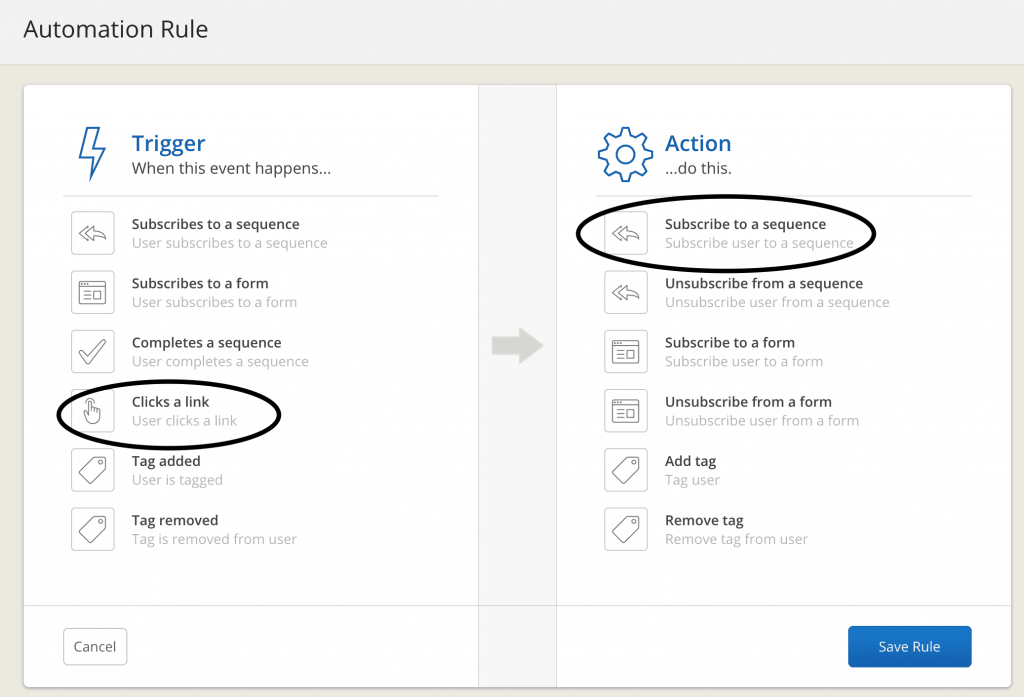
Head to the automations tab in your ConvertKit dashboard –> select “new rule” –> this is what you’ll see:
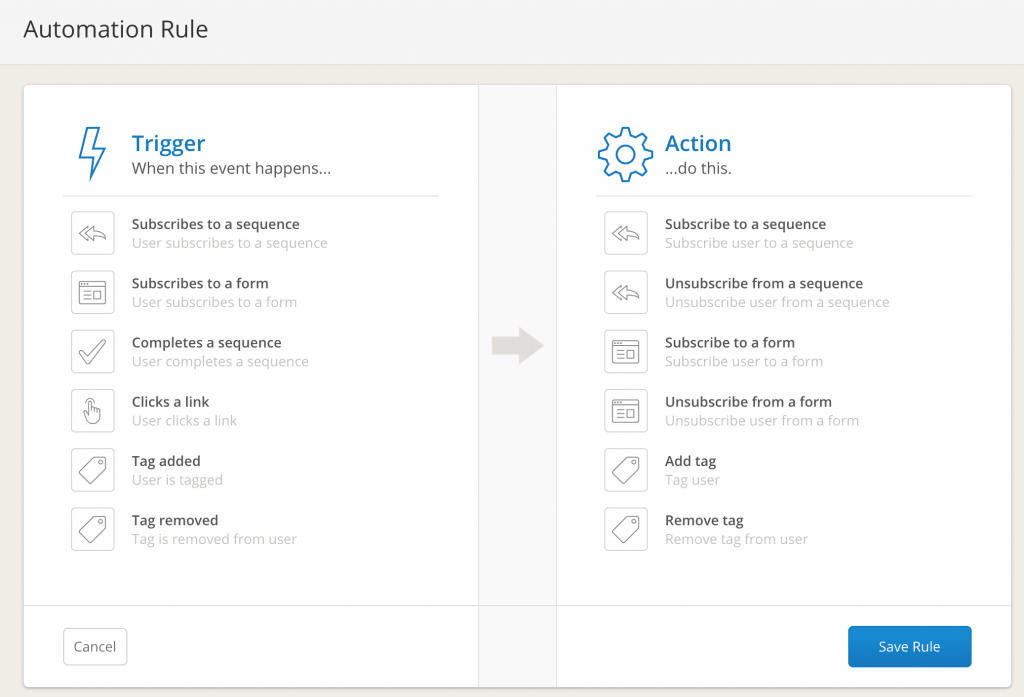
The “trigger” is the action your email subscriber will take and the “action” is the automated action that will occur afterward.
Triggers: Actions Subscribers Take
- Subscribes to a sequence
- Subscribes to a form
- Completes a sequence
- Clicks a link
- Tag added
- Tag removed
Action: Automated Result
- Subscribe to a sequence
- Unsubscribe from a sequence
- Subscribe to a form
- Unsubscribe from a form
- Add tag
- Remove tag
How to Use Automations to Grow Your Business
Generally, there are two main objectives people have for their email list:
- Nurture potential customers/show value
- Convert subscribers into paying customers
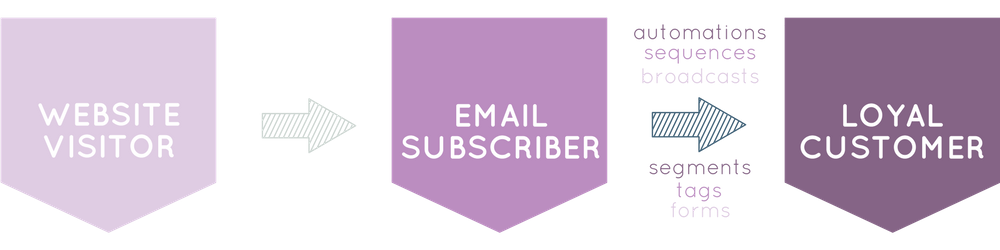
One of the best ways to nurture a potential customer is through a series of emails. In ConvertKit, these are known as sequences.
Sequences usually include multiple emails that trigger once a subscriber takes a certain action on your list. For example, let’s say you offer a free webinar. Upon signing up for your webinar, your subscriber gets added to a form which links to a sequence and the first automated email sends. The first email might be reiterating the webinar details, the second might be a reminder email, and the third could be a follow-up after the webinar takes place.
Now what? How do you continue to nurture your new email subscriber once the webinar is over?
Set Up an Automation to Trigger Subscribers into a New Sequence
Even better, allow your email subscribers to choose their own path through your nurture sequences!
https://youtu.be/n3lVQyIesYM
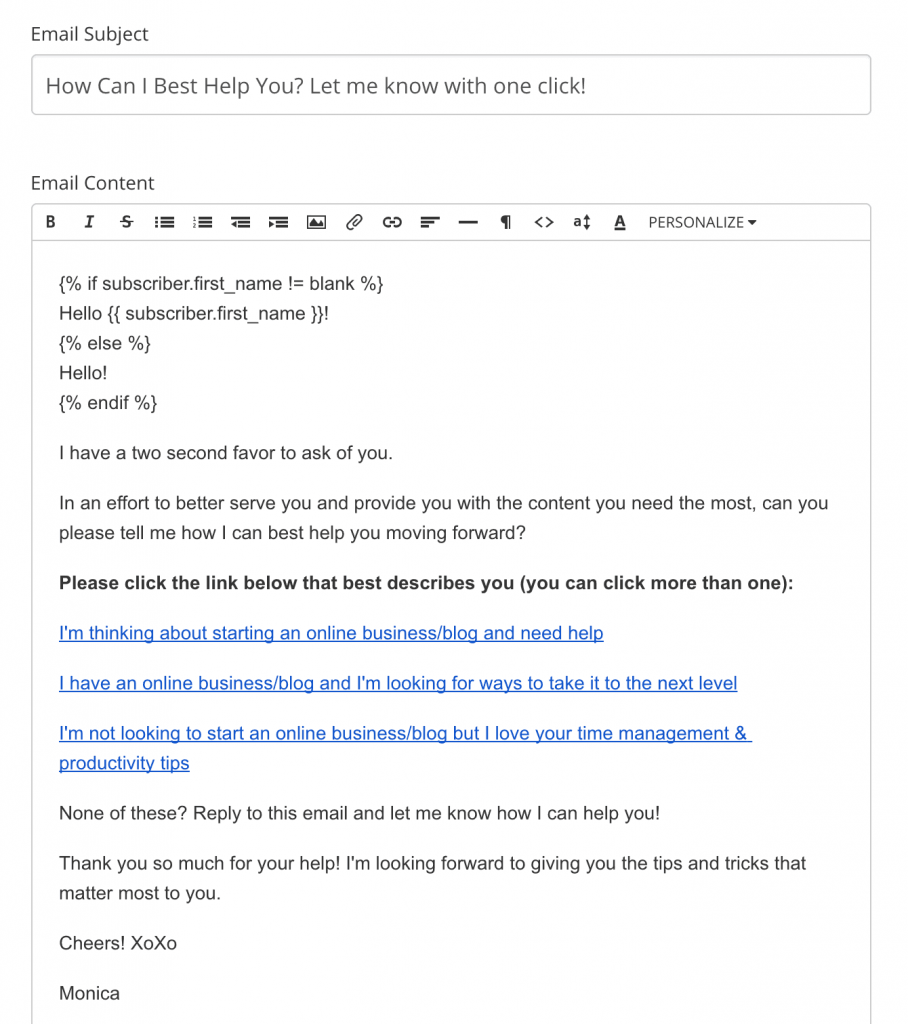
Step #1 Add an email to the end of your current sequence that asks your subscriber to choose their own path
Here is an example of what mine looks like:
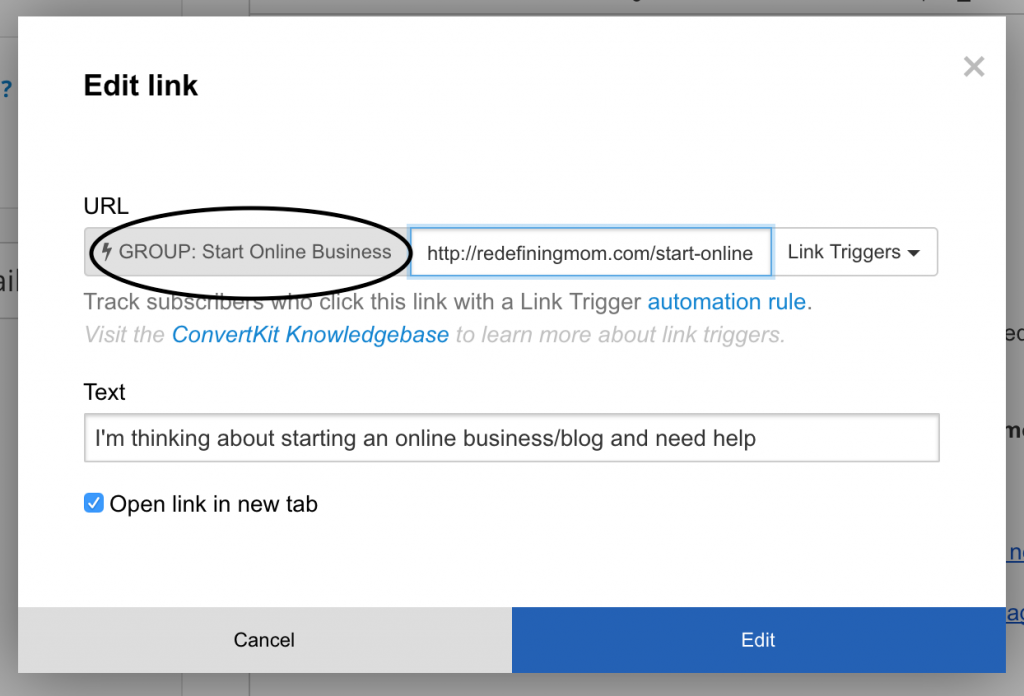
Step #2 Set up custom URLs on your website
If someone clicked on, “I’m thinking about starting an online business/blog and need help,” they would be redirected to a custom URL. The custom page says something like this, “Cool, you wanna learn how to start a blog. I’m going to start sending you emails on how to start a blog. But in the meantime how about you check out these free resources that I have to offer!”
Step #3 Set up a new automation rule
Under trigger, select “clicks a link” and enter the URL you just created.
Under action, select “subscribe to a sequence” and choose the next sequence your customer will now go through based on their selection.
Step #4 Add the new link trigger to your sequence email
Under the text editor in your sequence email, you can add a link trigger. Highlight the text that indicates which path your customer wants to take next and add the link trigger you just created.
Now you’ve mastered ConvertKit automations! Next up, we’re going to walk through the difference between segments and tags in ConvertKit!
Additional Resources for Growing Your Online Business
How To Make Money Blogging: $1,135 in My First Month Since Quitting My Job!
Ultimate Beginners Guide to Blogging: How to Blog for Money
Pin Practical Masterclass: How I Grew My Email List from 52 to Over 10,000 in Under a Year
Pin it!
3 Comments