
This post may contain affiliate links, which means if you purchase from one of these links I will receive a commission. Please read my full privacy policy for more information.
Do you want to start a blog but you have no idea where to start? I can relate. Before I started this website I had absolutely no idea how to register a domain. Did you know you have to pay to have your content hosted on a server? Uh, excuse me? That sounds pretty intense, doesn’t it?
I wish when I decided to start this blog I had a beginners guide to blogging. Starting a blog can be overwhelming. There is an abundance of information out there on what to do and how to do it. Naturally, the more information that gets thrown at you, the harder it seems to get started and be successful. Let me tell you, it IS possible to blog for money.
Article updated October 2019
I fell into the analysis paralysis trap for over 2 years and it stopped me from making any money on this blog. I finally decided that I had to either figure out the formula to being successful or quit and find another hobby.
Now is the BEST time to start a blog!
In a hurry? Click here to save the below pin for future reference 🙂
 Blogging is Best Done in Community
 Blogging is Best Done in Community
Before we get started, I highly recommend joining one of the many Facebook groups for mom entrepreneurs. Join supportive and encouraging moms who are eager to help each other build successful online businesses, like this one below:

“When I decided that I wanted to launch my own online business I jumped on my Pinterest app and started to research the process to get started. Within a few minutes, I had found Monica’s resources that helped people just like me to get started. She covers the big picture of building your own online business with tools and resources to back it up. I found resources like Monica’s that I signed up for those as well, however, Monica’s were the only ones I followed through with daily. Monica’s resources have really helped me to find my business tribe and determine exactly who my audience is among so many things. Within a week of following her resources, my website was up and running. If you are looking for a resource to help you build the foundation of your business you need to follow Monica today.”
~Heather Farris from The Balance Mamas
Don’t feel like reading this whole article? Skip to the bottom for the top 9 resources I use to run a successful blog!
Let’s get started!
Beginners Guide to Blogging: 4 Stages
I have identified 4 stages that a blog goes through on the journey to making money. My advice to you is to assess the stage you are in today. Focus your attention on the resources that can help you master those skills before moving your attention to the next stage.
Let’s get started!
Stage 1: Setting Up Your Blog
For more detailed instructions on how to start your blog, read my post:
How to Start a Blog in 20 Minutes
Step 1: Choose a hosting provider
I prefer Bluehost for the new websites I’ve been starting lately. While I used to not recommend Bluehost, they’ve drastically improved their customer support and up-times since 2018, making their services hard to beat. They also have some amazing benefits that stand out from the competition…
- 99.9% uptime (because who wants their website to be down all the time?!).
- One-click Wordpress install, making it one of the easiest hosting companies to get up and running quickly with Wordpress!
- Affordable renewal prices (a fraction of the price of popular competitors), meaning you won’t be hit with a huge bill after the first year.
- FREE SSL certificate for one year ($82 value)—many hosting providers charge $100+ a year for this feature.
- 24/7 Wordpress hosting support via chat or phone, in case you run into a fatal error at 3am!
- 30-Day Money-back guarantee – you’re not locked into a contract and there are no hidden fees.
Step 2: Select Your Plan
I recommend starting with the Choice Plus plan, as it gives you the perfect amount of room to grow as new blogger/website owner. The great thing about Bluehost is that you can seamlessly upgrade as you go, and the upgrading costs are clear.
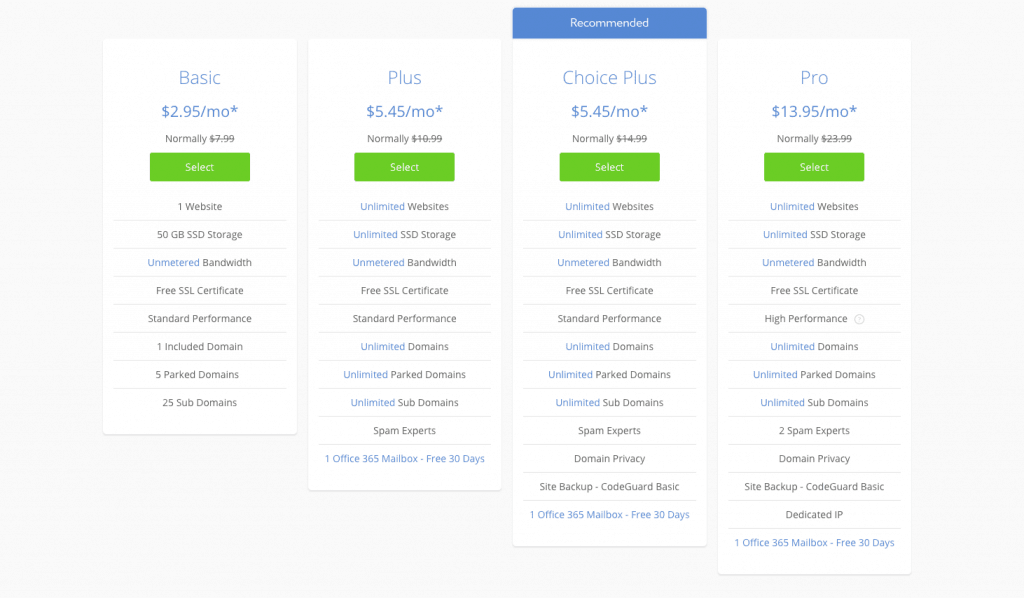
The Choice Plus plan comes with a 30-day money back guarantee!
Step 3: Choose Your Domain
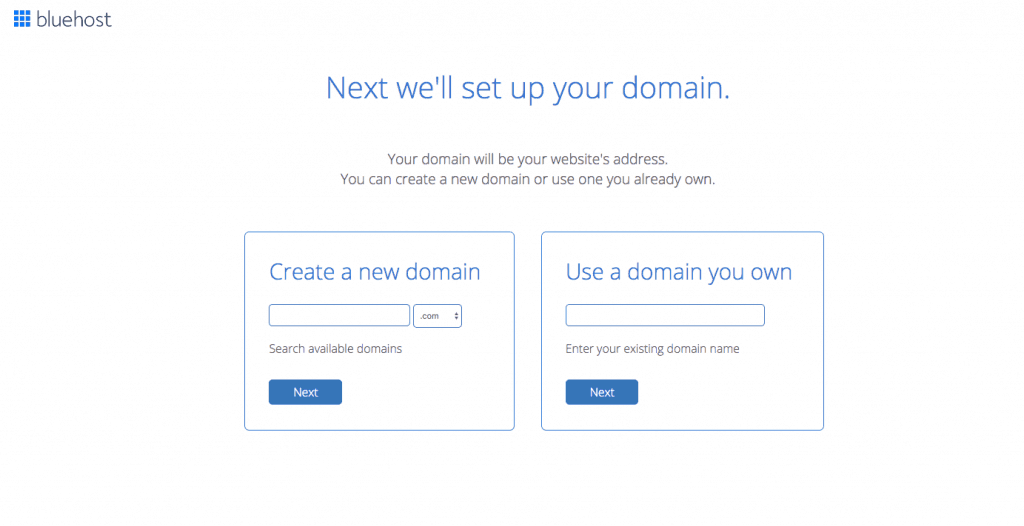
Bluehost gives you two options:
- Purchase your domain name directly through Bluehost.
- Use a domain name you already own through another provider, like Namecheap.
I register all my domains with Namecheap. Purchasing your domain separately from your hosting site gives you an added layer of security.
How to Purchase a Domain Through Namecheap
Head on over to Namecheap.
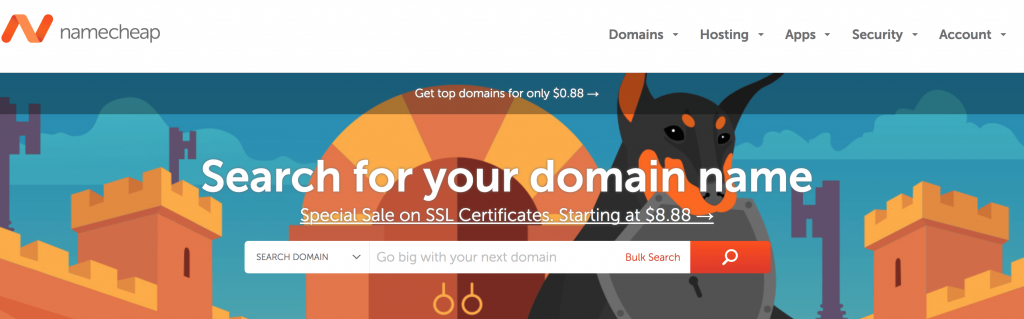
Enter the domain name you’d like to register.
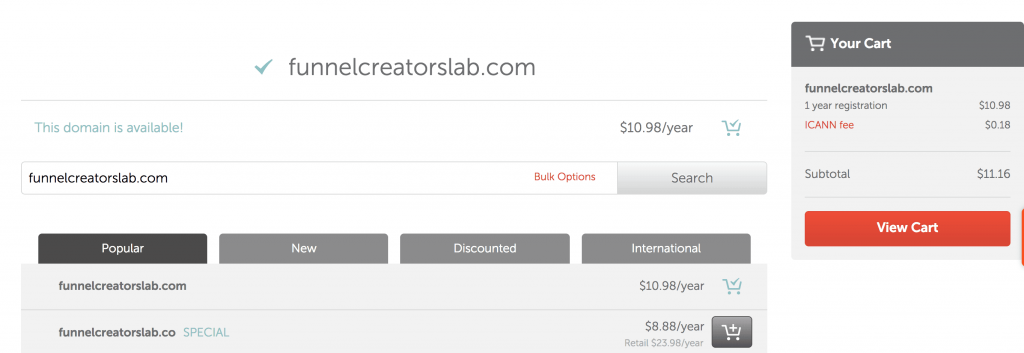
If the domain name you want is available, add it to your shopping cart.
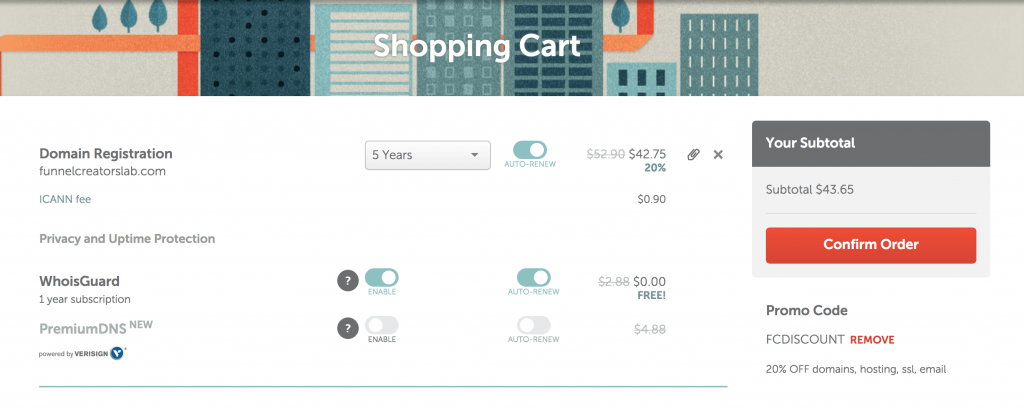
UPDATE: WhoIsGuard is now free for life when you purchse a domain from Namecheap!
Make sure the WhoisGuard option is enabled if you don’t want people to be able to find who owns the website (including your name and address).
PRO TIP: I use the Chrome extension, Honey, to search for discount codes I can use when checking out online. In this case, I saved 20% on my order by using this extension!
After you’ve purchased your domain name on Namecheap, you can finish checking out on Bluehost.
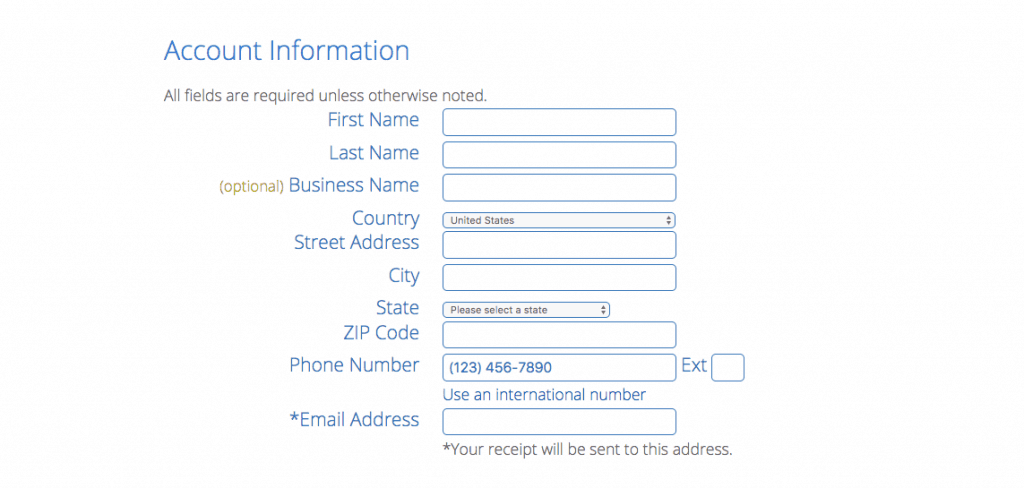
Step 4: Fill Out Account and Payment Information
Here’s what your checkout screen will look like…
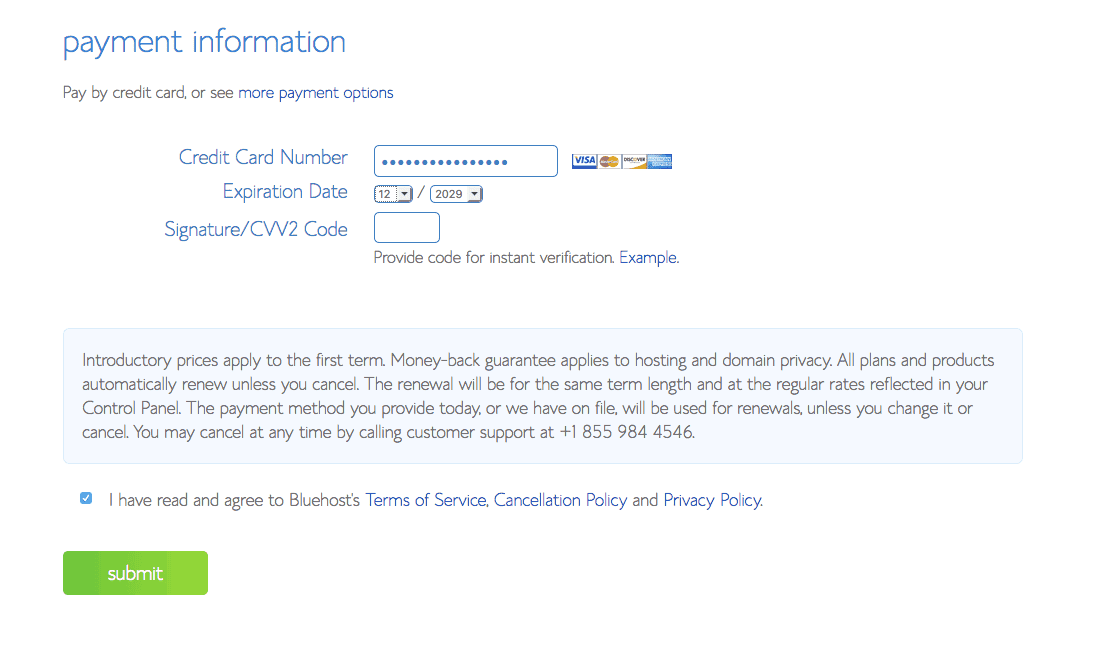
Then you’ll enter your payment information…
Step 5: Choose Your Package
Next, you’ll choose which hosting plan you’d like and the length of the plan. If you choose the 36-month price, you’ll get the most bang for your buck.
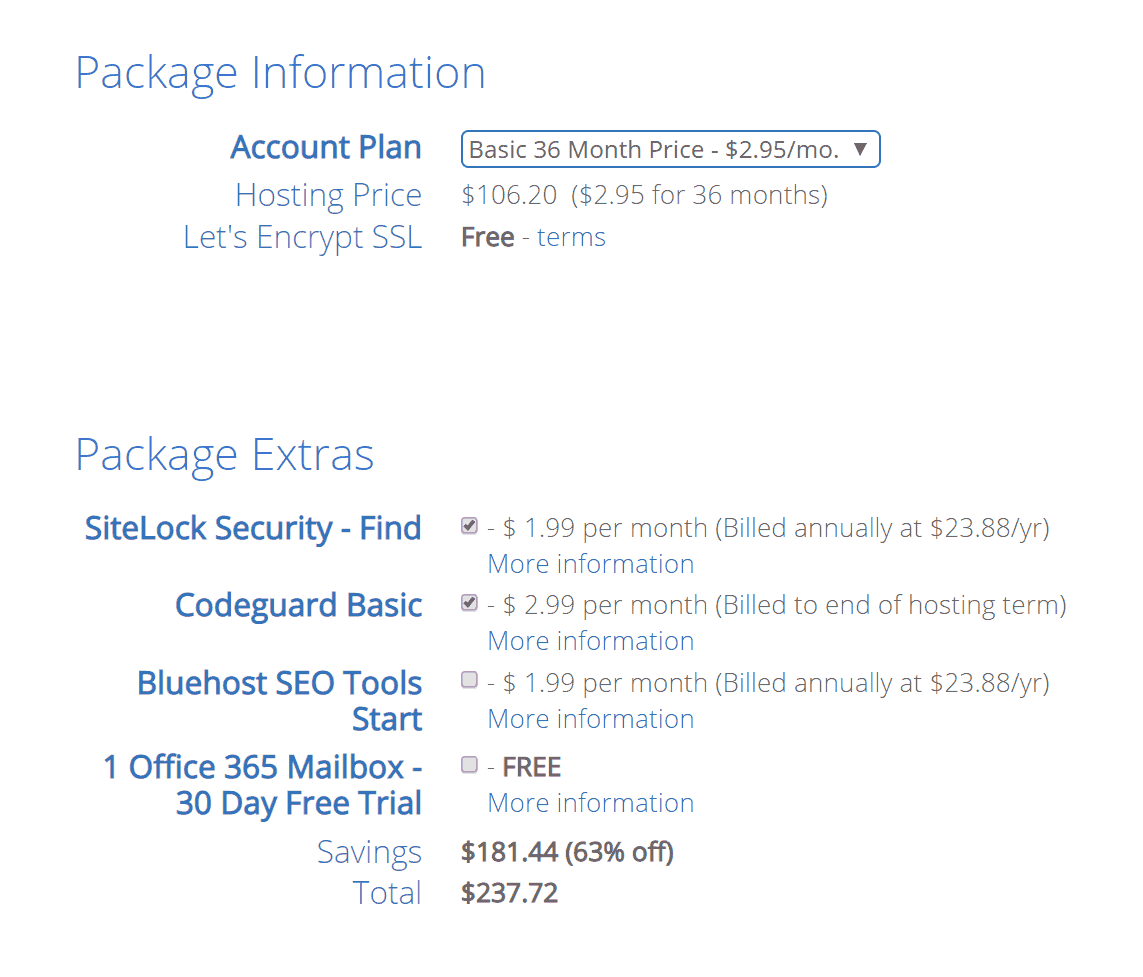
Some extras I recommend selecting include…
- SiteLock Security – Keeps your site safe and free of spam.
- Codeguard Basic – This service takes daily backups of your site, so if you accidentally mess up something and crash your site, you’re covered!
Step 6: Create Your Account
First, you’ll need to create a new password for your account. This is what you’ll use to log into Bluehost and Wordpress.
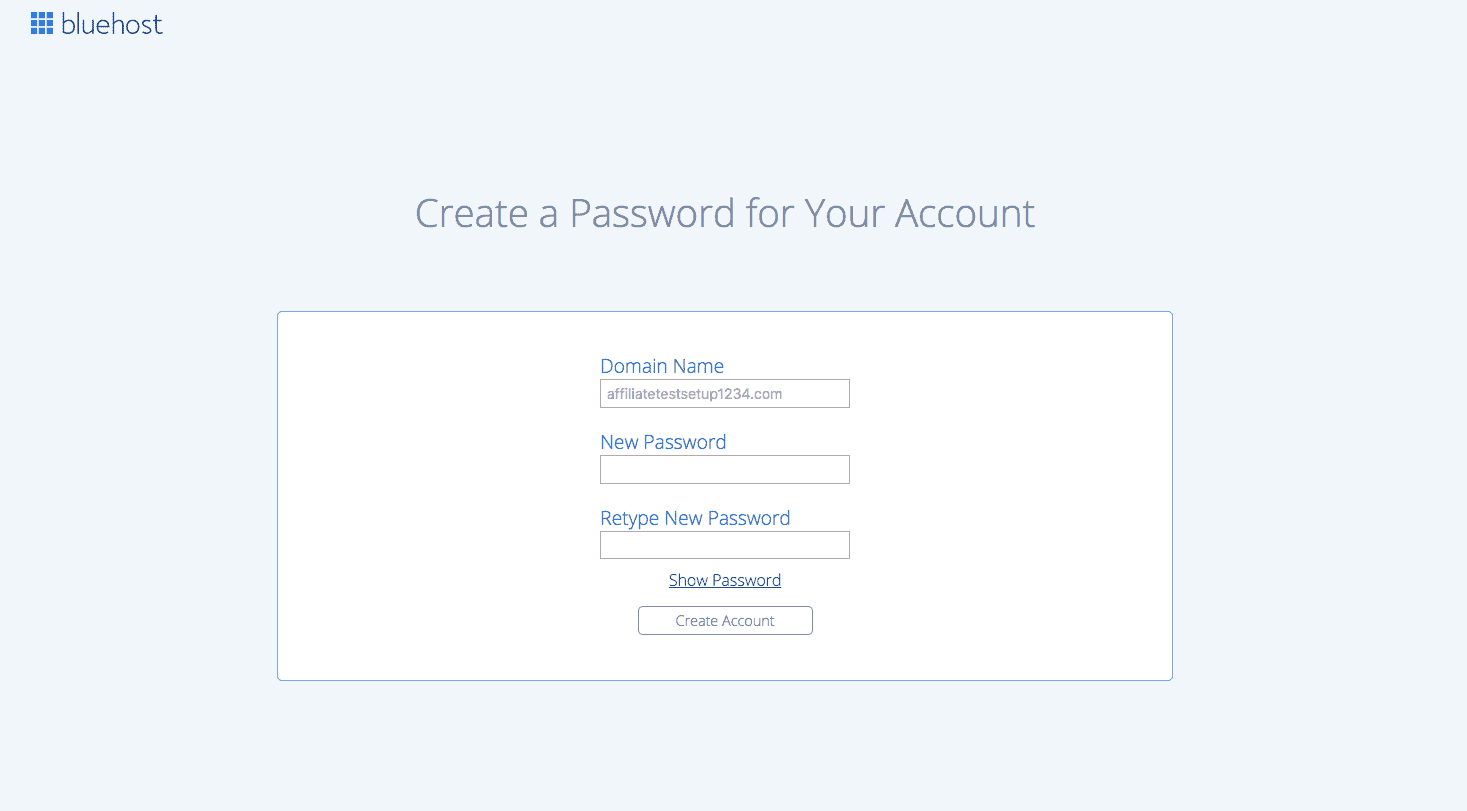
Click “Create Account,” then you’ll be taken to this page.
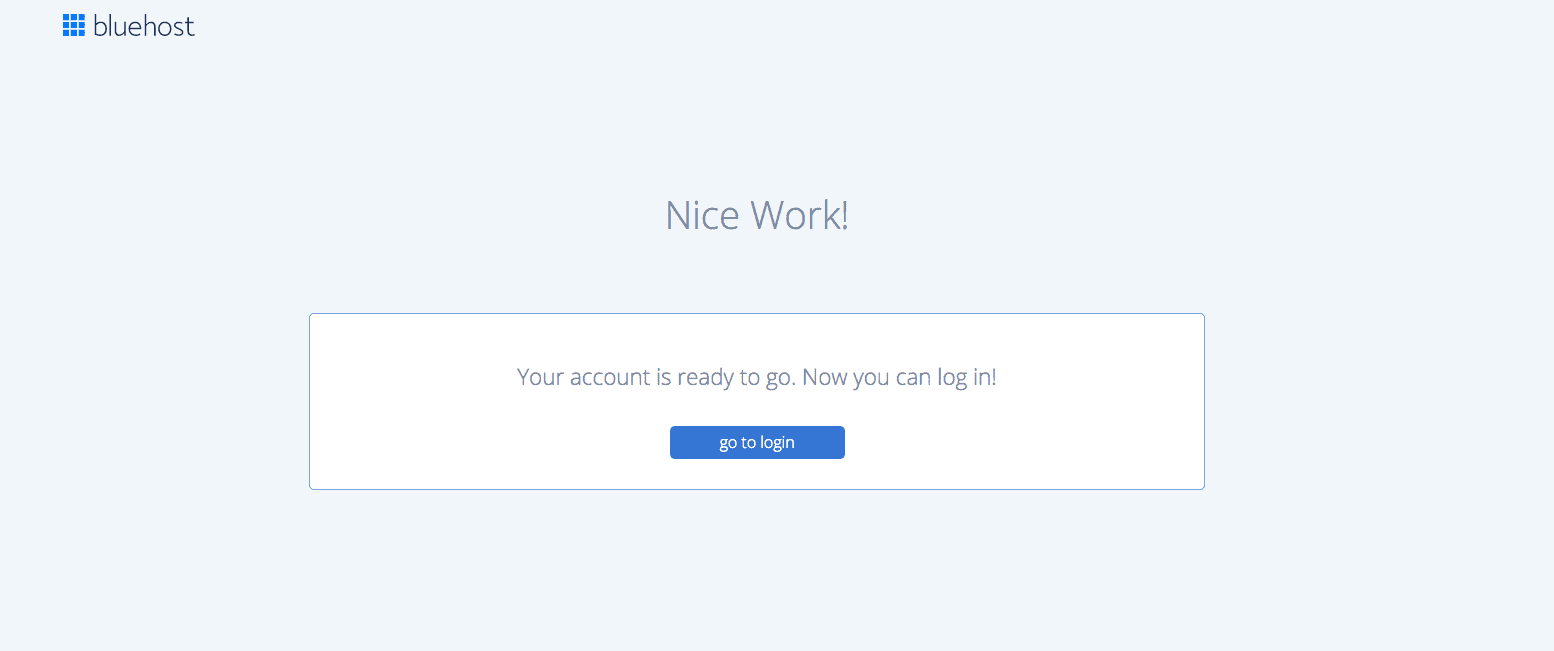
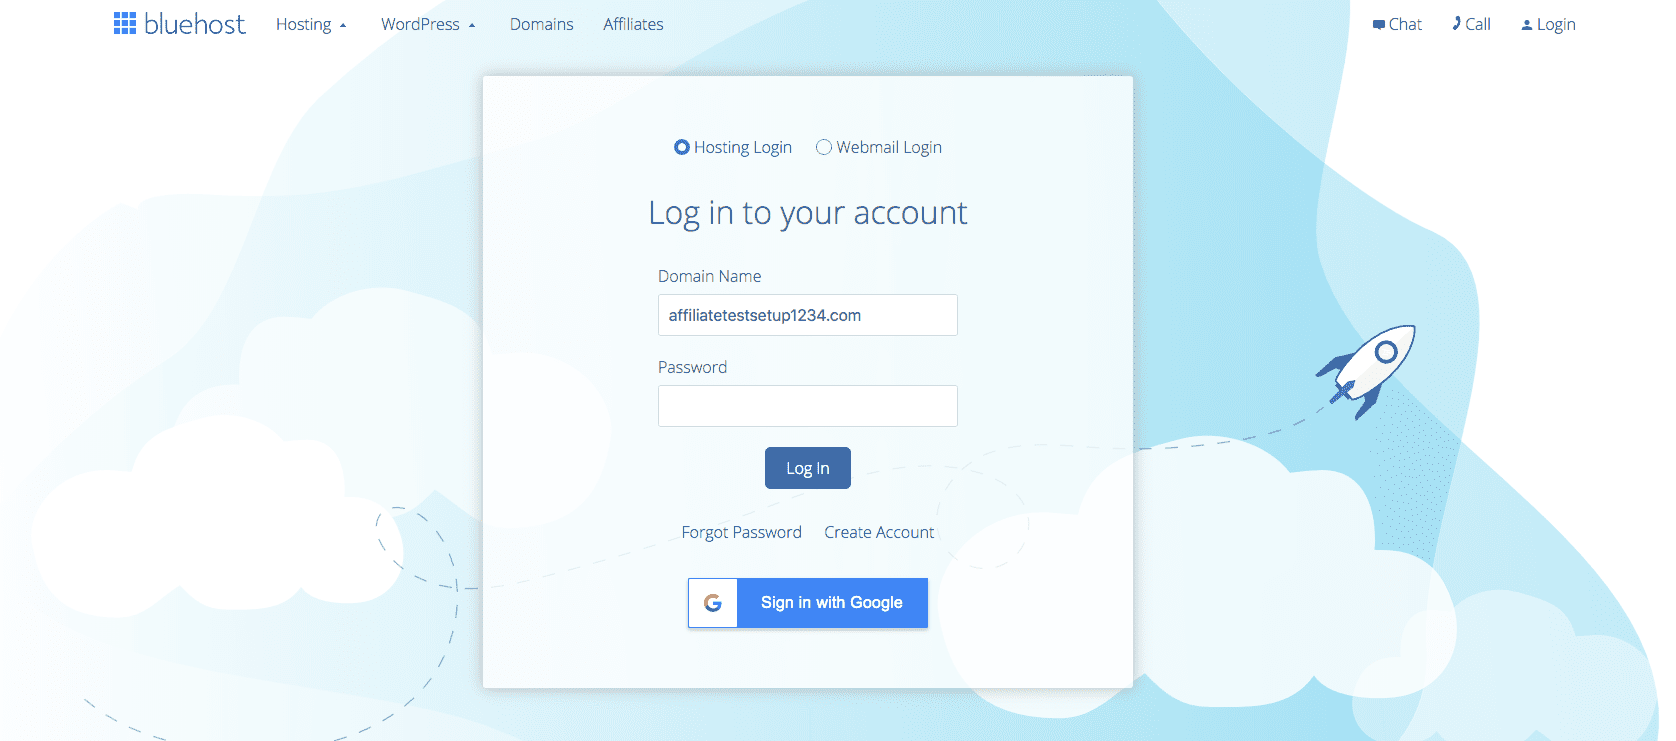
Click, “go to login,” then you’ll be taken to this page where you can log in with the password you just created!
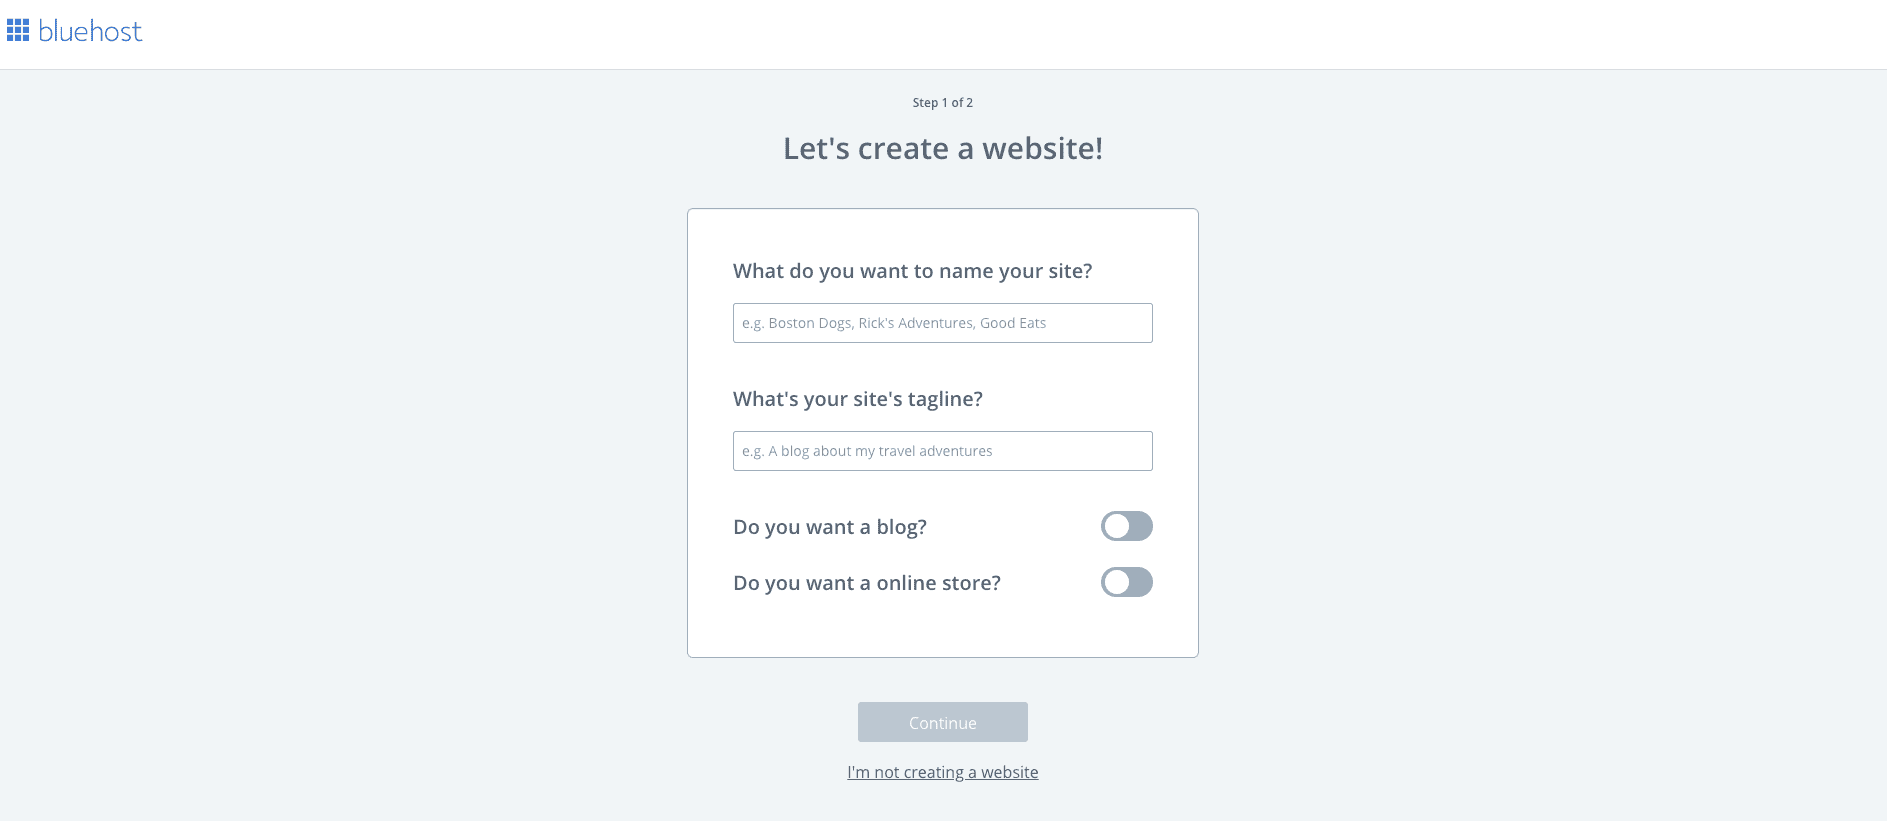
Step 7: Set Up Your New Website
This is an exciting part! On the next screen, you’ll get to name your website. For example, this website is Redefining Mom. You’ll also enter your site’s tagline. This is used in your site description on Google and on your homepage. Our tagline is Where Women Thrive in Motherhood and Business.
Make sure to turn on “Do you want a blog?”
If you know you want an online store, you can turn on that switch, too. If you’re not sure yet, keep it off.
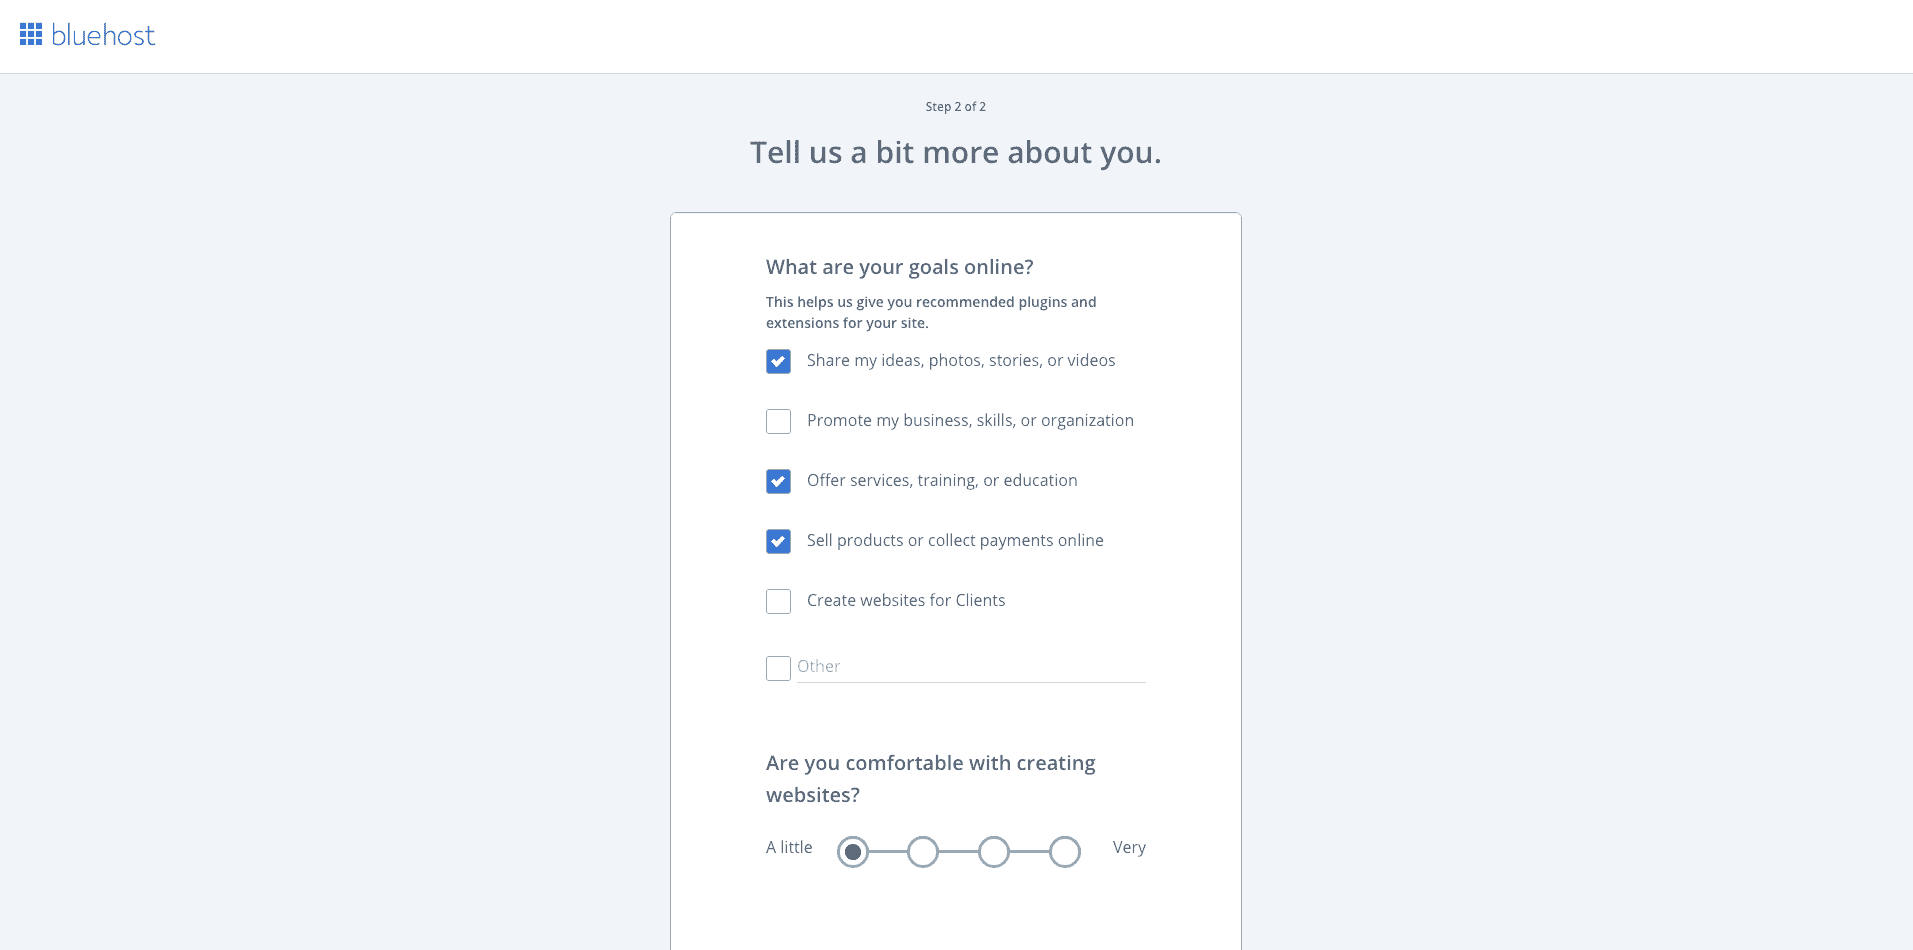
On the next page, Bluehost will learn a little bit about you to help you on your website-creation journey.
Step 8: Skip “Select a Theme” & Install Wordpress
You have two options here: Use a free theme from Bluehost, or buy a more built-out theme from another site.
I recommend skipping this step and downloading your own theme from a 3rd party site. I’ll go into details and give my recommendations in Step 11. For now, click “skip this step.”

Next, Wordpress will automatically install on your website!
After it’s finished installing WordPress, you’ll click the big blue button that says, “Start Building.” This will take you to your Bluehost dashboard.
Step 9: How to connect Bluehost hosting with your Namecheap domain
If you purchased your domain separate from Bluehost, you’ll need to add your domain to Bluehost.
First, log in to your Bluehost account and click Domains on the left-hand side. In the list below it, click “Assign.”
Check, “Use a domain that is not already associated with your account,” and type in your domain name in the box below.

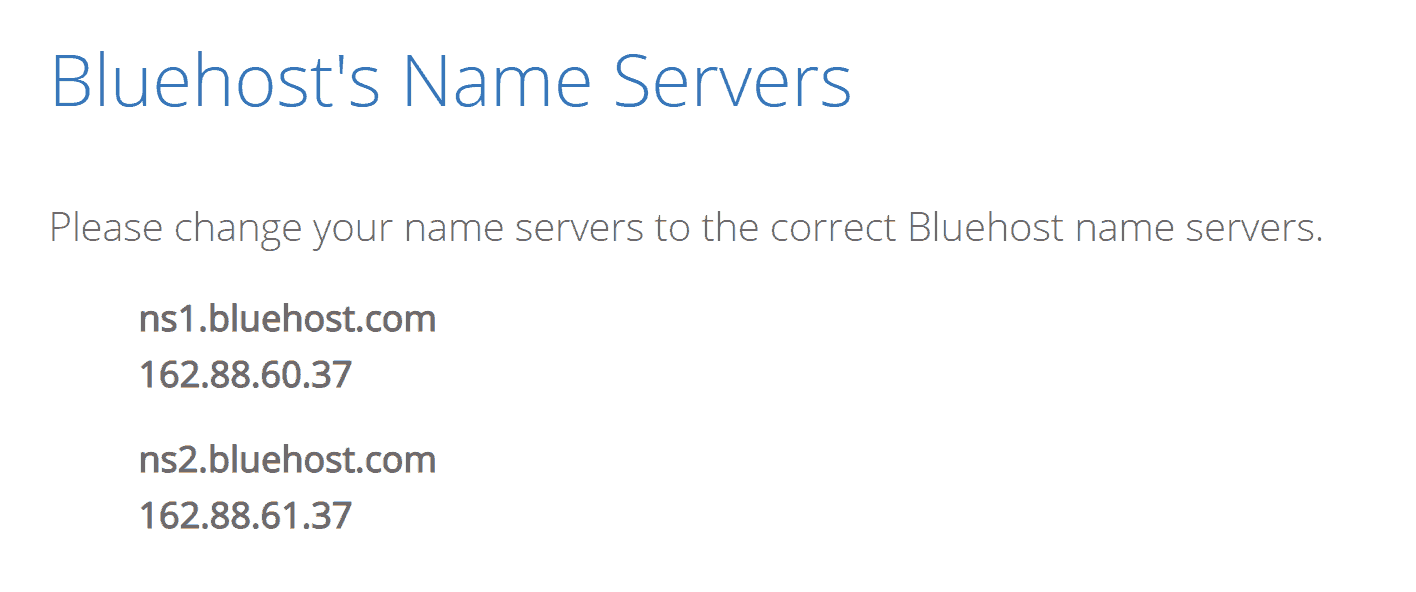
In Step 2, Bluehost will give you the name servers that you need to change in your domain.
Head back over to Namecheap and navigate to your dashboard. Here you’ll see a list all the domains you’ve purchased.
![]()
Select “manage”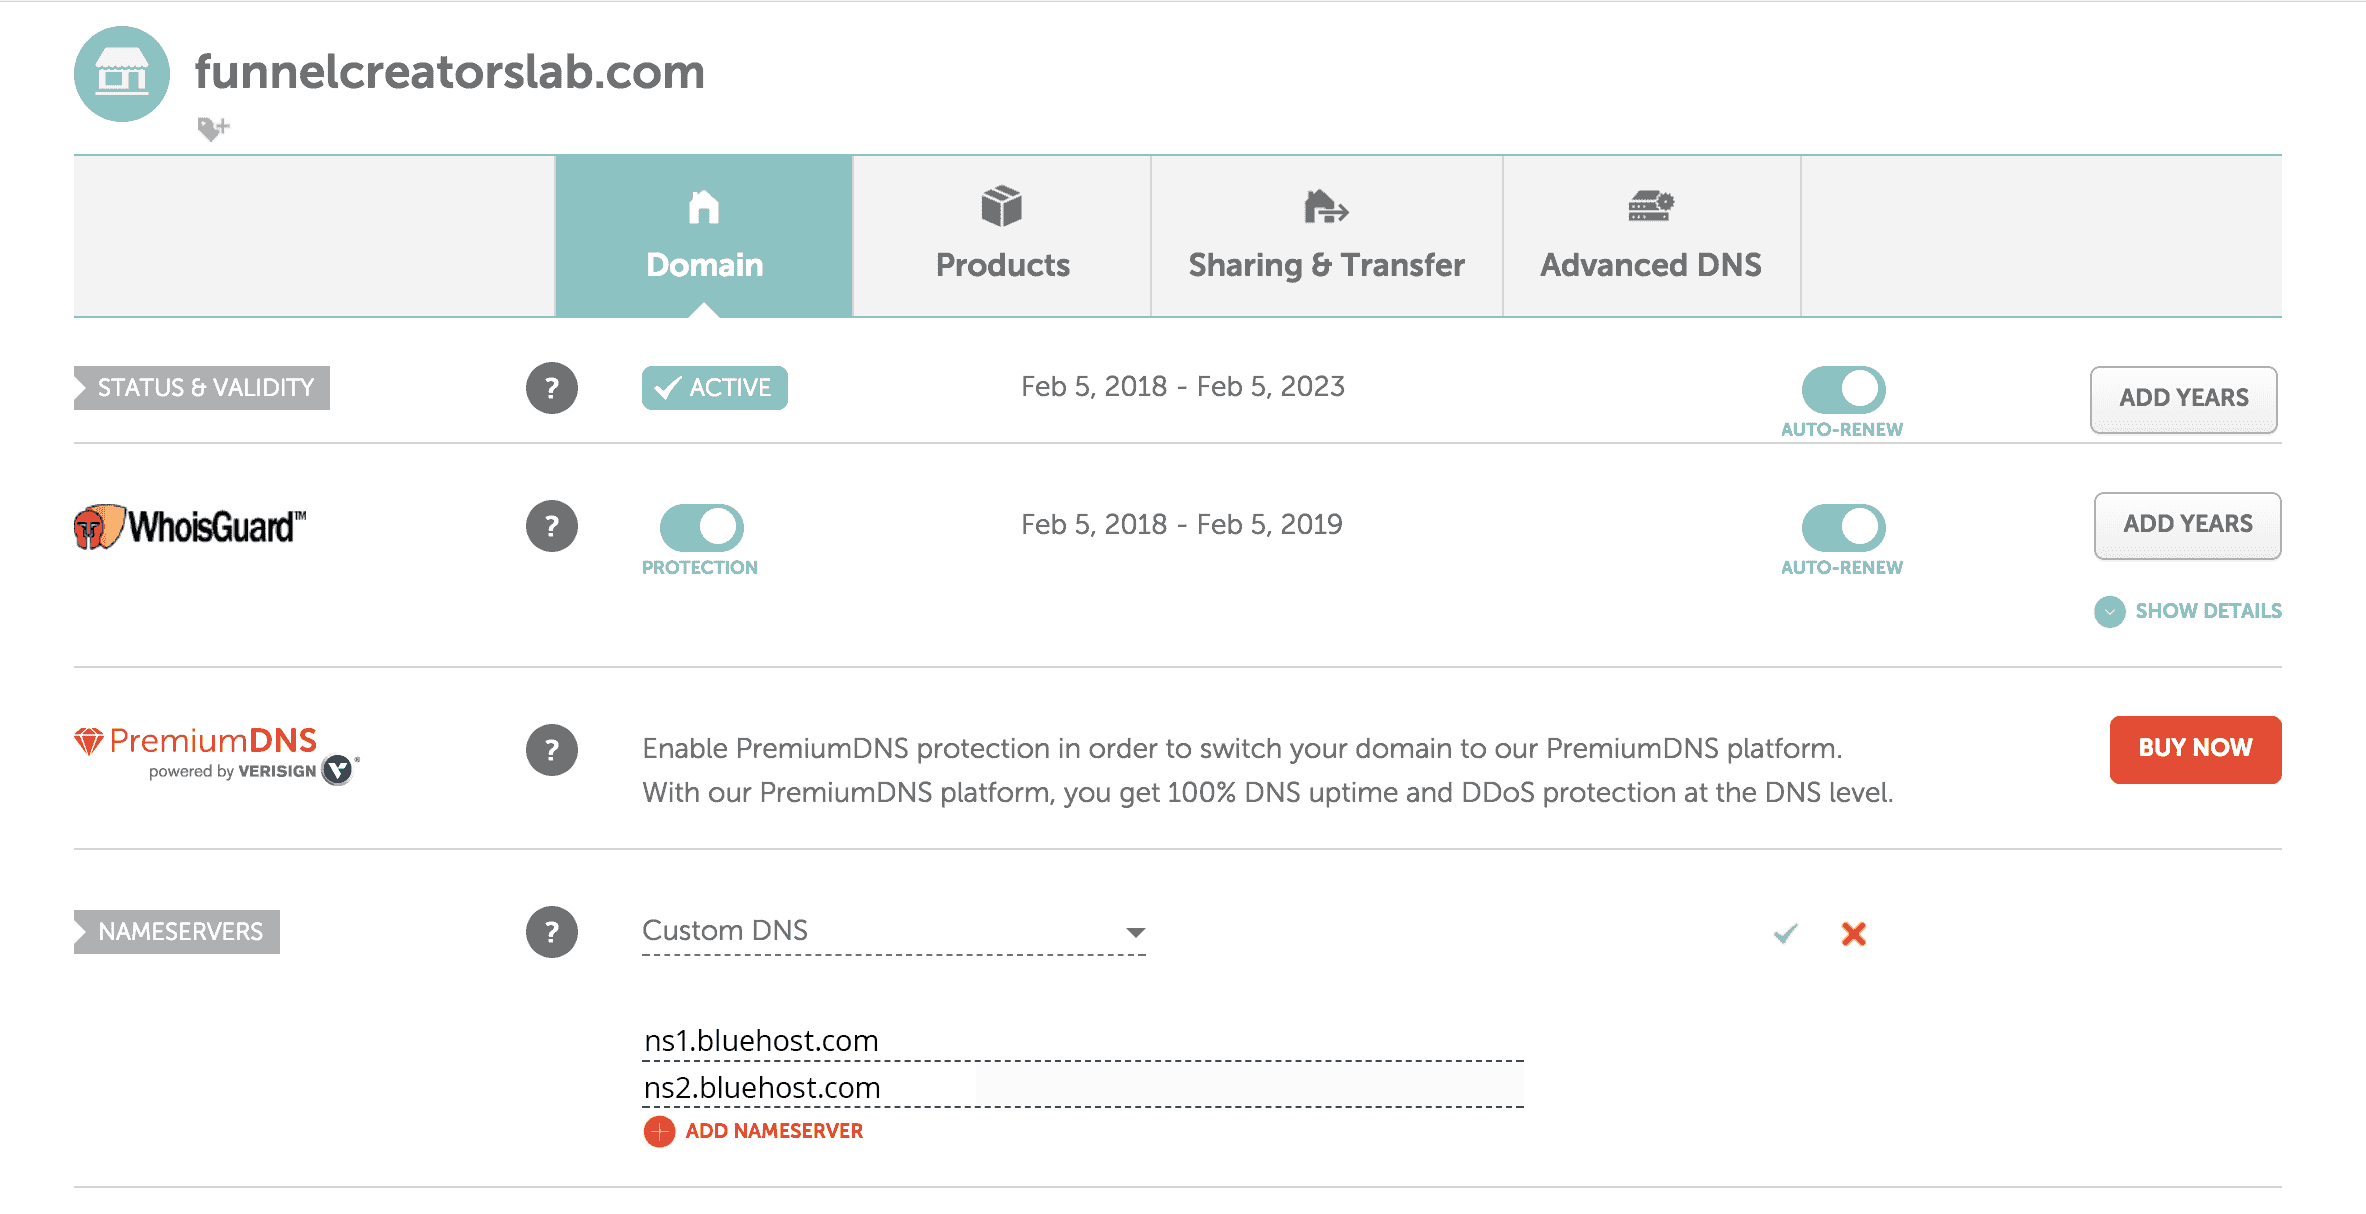
Under “nameservers” select “custom DNS” and copy Bluehost’s DNS records from this link. Select the green checkmark to confirm your entries.
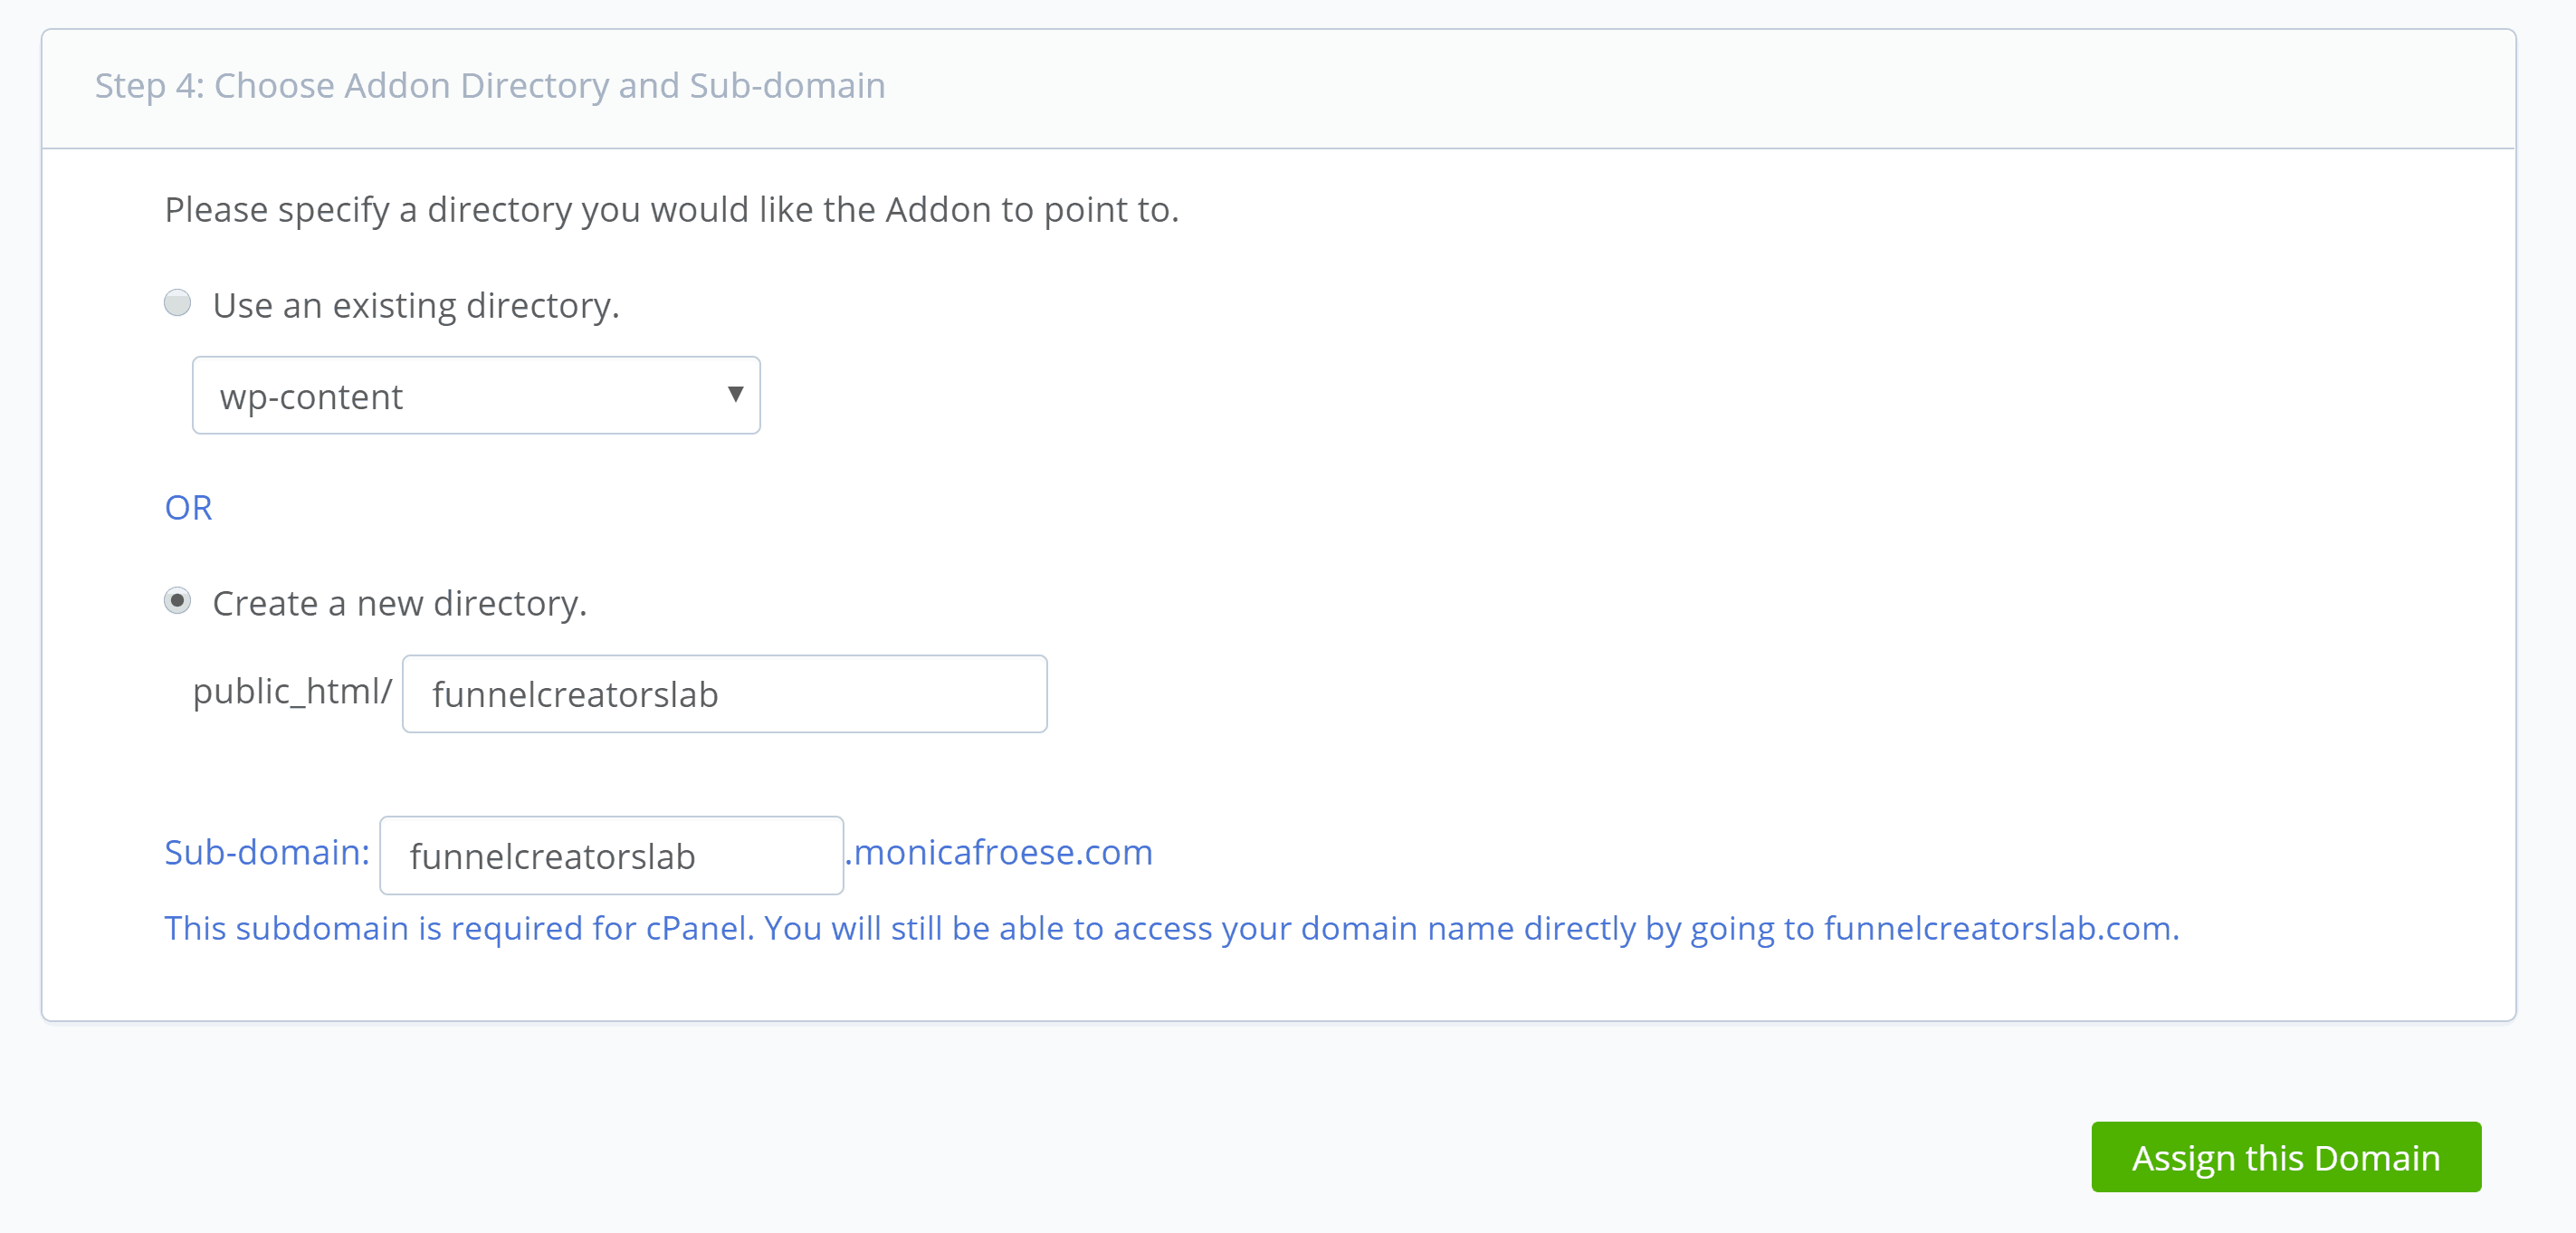
Now, go back to Bluehost. In Step 3, select “Addon Domain.”
In Step 4, choose “Create a new directory,” then click the green button at the bottom that says, “Assign this Domain.”
It may take 24-48 hours for your domain to link up with Bluehost.
Step 10: Log in to your WordPress Dashboard
From your Bluehost dashboard (login here), click the big blue button that says Log in to Wordpress.
Note: This button will only work once your domain has successfully linked to Bluehost.
Step 11: NOW Select a Theme!
I use the StudioPress’ Genesis Framework with the Lifestyle Pro child theme (also sold by StudioPress). Genesis is widely recognized as the best framework for building a WordPress website with a ton of free tutorials available on the web to help you properly configure your setup.
Restored 316 themes are also a great source for Genesis child themes. Here’s a video where I show how I set this up…
https://youtu.be/DCYK9VhP-f0
During your blogging journey, you will undoubtedly add many plugins to your site.
In your WordPress dashboard go to Plugins → Add new → Search for desired plugin → Install now
Here’s a list of a few I suggest you start with…
Akismet spam protection for your blog
BackupBuddy backup your blog’s database for an extra layer of protection
CommentLuv shares the love with your readers by allowing them to link back to the most recent blog post in their comments
JetPack offers many features that can be used to enhance your blog, I primarily use the feature that auto-posts my new blog posts on social media
Social Pug adds a section in WordPress below your content that allows you to control the picture and description that preloads when someone uses the social share icons on your articles or pages
Wordfence Security protects your site against hackers
Yoast SEO optimizes your website and articles for Search Engine Optimization (SEO), basically get yourself found in Google search results!
Step 12: Set up Google analytics
https://youtu.be/nvUQEqSujIc
Step 13: Choose your brand fonts and colors
Start branding yourself from the very beginning. Almost everyone will tell you that their first web design and branding choices were horrendous, including mine! I started in 2013 with a hideous green. In October 2015, I paid a graphic designer to redo my website header, social media graphics, and define a color palette and fonts for me. Since you are just starting out, paying someone may not be realistic, that’s okay! Here are a few websites you can use to help you out:
See, I told you it was pretty bad!
Stage 2: Growing your audience
After you’ve set up your website and decided on a brand, now it’s time to get your ideal customers coming to your site!
Step 1: Establish social media accounts
I do not recommend trying to master all of the social media platforms at once. You will quickly discover that using social media to promote your blog is a lot different than using it for sharing personal moments with your friends. Social media is strategic and it takes a lot of time to build your audience on each platform.
Establish an account on all major social media platforms so that your professional brand cannot be used by someone else:
- Snapchat
- YouTube
BEGINNER’S HACK: Install the MiloTree plugin on your site to drive people to subscribe to your social media channels.
Choose 2 networks to begin posting on regularly and growing your audience. My main focus is on Pinterest (where most of my traffic comes from), the second focus is Facebook, and the rest all fall closely behind in third. Here are some resources I recommend checking out for increasing your social media engagement:
![]()
Pin Practical Masterclass teaches you how to turn Pinterest visitors into email subscribers and ultimately make you money!
Tailwind the Pinterest scheduler I use on a daily basis to proactively schedule my Pins for the week or month
https://youtu.be/JdDJ0sL3oAs
HootSuite I use to schedule my tweets and occasionally I use it for Facebook posts (but mostly I use the native Facebook scheduler to schedule)
Step 2: Select an email service provider
One of the things I put off when I started my blog (for 3 years- yikes!) was set up an email service provider so that I could start to collect emails addresses from people who came to my site and would eventually become my customers.
To sum this up for you: you don’t own your followers on social media, but you do own your email list!
Since we have many anti-SPAM laws, email service providers are required for collecting email addresses and legally sending bulk emails.
Legally if you are collecting people’s email addresses you need to properly disclose how you will use them. Amongst other legal requirements, you can visit my privacy policy, and terms of use to see the types of information I disclose. All links are found in the footer of my site. Please note: you cannot copy someone else’s policy and terms, it would be considered copyright infringement. A great resource for templates you can use is Businessese (written by real lawyers).

I use ConvertKit for my email service provider, but I also recommend Constant Contact.
The segmentation, automations, embedded forms, and landing pages that are offered through ConvertKit are a marketers dream. I have an entire (free) series on how to get started with ConvertKit: How to Get Started with ConvertKit Tutorials
Do you want a free month of ConvertKit? –> Try the Convertkit Club FREE for 1 month!
Step 3: Create 15-20 evergreen articles
Content is king! The backbone of your blog is the content you put on it. You cannot make money without having a solid foundation of engaging articles that people come to read. These articles will show you as a subject matter expert and start to form your reputation in your niche. Evergreen content is sustainable and transcends time. It’s relevant today and it will still be relevant two years from now. An example of an evergreen article: 7 Guilt-Free Ways to Make Time for Yourself
4 steps to creating an amazing evergreen article:
- Optimized photos for social media: The social pug plugin allows you to control the picture and description that preloads when someone uses the social share icons on your posts. It also gives optimized sizes for sharing on social networks
- SEO: Use the Yoast SEO plugin to guide you through optimizing your post for SEO. Another trick to finding relevant keywords is to use Google Trends.
- Consistent branding: The best way to make sure that you stand out in a crowd is to use consistent branding on your website and photos. As we discussed above, once you decide on your branding colors and fonts make sure to incorporate them into everything you do.
- Amazing photos: The world is a visual place now. If you want to drive page views to your site (which you need in order to monetize) you must use amazing photographs… every.single.time! Not a good photographer? No problem, there are plenty of public domain photos you can use. Always be sure to read the terms for each photograph to determine if you must give credit to the source. To make things easier, I only use photos I pay for through DepositPhotos.
Free editing software:
This video is also included in Pin Practical Masterclass.
Step 4: Network with other bloggers
The blogging world is a community. Other bloggers are not your competition, they are your friends! Ask any successful blogger out there and they will tell you that forming real relationships with other bloggers was the turning point in their online career.
Where to look:
- Facebook groups: Do a search on Facebook for your niche and ask to join. Some of my favorite are: Boss Mom, and Biz Chix Coop
- Local entrepreneur get-togethers: Do a Google search to find one in your area.
- Attend a conference: This is probably my favorite way to meet new people. Google conferences in your niche to find the one that is best for you. In the past I’ve loved EBA Activate and Biz Chix Live.
Stage 3: Monetization
In the beginning, the ability to make money will tie closely to your page views. It makes sense, the more people who visit your site, the more ad revenue you can make, the more potential buyers you have to purchase affiliate products, and the more email opt-ins you can add to your growing email list.
Step 1: Continue growing your list
Highlight an amazing freebie (opt-in offer) on your site that closely relates to the popular topics on your blog. To find the posts that are performing best on your site do the following: Google Analytics dashboard –> behavior –> site content –> all pages
Look at your top 10 posts and determine the common theme you see that your audience is interested in. Develop your freebie offer around that topic.
Ideas for a freebie:
- Short eBook
- Printable
- Email series (automation through your email service provider)
- A resource list of products that will solve a problem your readers have
- Spreadsheets
- Templates
- Video content
You can see a list of all the freebies I offer: Redefining Mom Freebies
Promote your freebie:
- SumoMe
- Hello Bar
- LeadPages
- ConvertKit (forms and landing pages)
Promoting a freebie without spending money:
Hello Bar is a fantastic (and free option) for promoting a call to action like promoting a freebie on your site.
This is one I’ve used in the past:

Another great way to promote a freebie is to have an embedded form “above the fold” on your website. This means it shows up before the user has to scroll. I have mine show on every single page of my website. I use ConvertKit embedded forms.
Setting up a free email course:
An example of a free email course is Pin Practical Ads. That is the landing page I created through LeadPages and I also advertise the course at the end of relevant blog posts using the LeadBoxes feature. Here is a snapshot of the end of one of my posts:
When my readers click this image a LeadBox appears to collect their name and email address:
LeadPages is a paid tool (it cost me a little under $300 for the year) and I purchased it before I made any money on my blog. It was the best investment I have made in my business thus far.
Follow me on YouTube for helpful tech tutorials on how to use some of my favorite tech tools including LeadPages!
https://youtu.be/gZkAyMDIiL0
Step 2: Place ads on your site
Now that you’ve started to grow your audience, you can start to place ads on your site. Most people start with Google AdSense because they don’t have a page view requirement. The other popular ad networks out there amongst bloggers are Mediavine and AdThrive.
Step 3: Sponsored posts
There are a ton of networks that connect influencers (you) with brands.
Influencer networks I’ve worked with:
Linqia the great thing about them is that your audience does not have to be huge to get started.
IZEA this is a bidding system. Once you sign up and fill out your profile you can begin bidding on campaigns from major brands like Sams Club and Johnson & Johnson. You decide the dollar threshold you are willing to work at.
Other influencer networks that I have not worked with but may be a good fit for you:
Step 4: Affiliate marketing
One of my favorite topics to discuss is affiliate marketing!
What is affiliate marketing? It’s when you recommend a product on your website and use a unique link with a tracking code so that you get credit for the sale.
There is no additional cost to your readers, they pay the same price they would whether you recommended the product or not but the creator gives you a commission for recommending their product and driving sales.
It’s a win-win for everyone. The seller drives traffic to their products, you make money for helping them promote their product, and your readers are introduced to products that matter to them.
What types of products should you promote? The most important thing to remember is that selling out to make a quick buck is not a way to build a business. Of course, you could decide to recommend products to make quick money but it’s not a sustainable business model and you will not build trust with your readers.
The first rule of affiliate marketing is to only recommend products you truly believe in and can give an honest recommendation on. For example, on my blogging and freelancing resources page, I list out a ton of products I use to run my blog. Some of these links are affiliates and some are not but ALL of these resources I use myself and can recommend from personal experience. Your first priority should always be to give your readers truthful and meaningful content that will help them solve a problem.
Disclose, disclose, disclose: You must disclose every single time you talk about an affiliate link on your blog and on social media. This is a very hot topic and it’s not only best practice, it’s the law! The FTC (Federal Trade Commission) FAQ’s is a great resource for understanding what you can and cannot do.
Learn more about affiliate marketing: How to Earn Money with Affiliate Marketing

Anatomy of an Affiliate Launch: Get an insider’s look into a $9,000 affiliate launch!
Stage 4: Create your own products
Most bloggers agree that the most lucrative way to make money is to create your own products. One of the criticisms of affiliate marketing is that you are sending your readers away from your site to purchase products from someone else. Essentially making them a fan of someone else’s work instead of your own.
It’s a valid argument but it doesn’t take into account that bloggers are very collaborative and most understand that blogging is done in a village and not on an island.
My recommendation is that while you are developing your own products, strategically take advantage of affiliate opportunities with products and brands you truly believe in. This will help you to establish credibility with the creators of these products and hopefully, you can leverage these connections for testimonials and affiliates of your own products.
Three main benefits:
- Creating a sales funnel for passive income (I have a free course to show you how to do this with Pinterest: Pin Practical Funneling)
- Establishing yourself as an expert in your niche (I talk about why that’s important here: What No One Tells You About Blogging and Motherhood)
- Building a loyal following
Example stages of product creation:
- Create a lead magnet (as mentioned above)
- Create your first eBook –> here’s my most popular one: Pin Practical Primer
- Create tiered packages for eBook (example: level one is your eBook, level two includes an upgrade for video tutorials)
- Create an e-course –> Check out all my courses!
Software to help you sell your products:
-
- ConvertKit for setting up automated email funnels <– grab my detailed ConvertKit Tutorials
- LeadPages for landing pages
- SendOwl for product delivery (I use this for my eBook and a few smaller products)
- Thinkific for course delivery
Beginner’s Guide to Blogging: My Top 10 Resources
These are 10 resources I have paid for and reference on a daily basis as I build my blog into an income stream. Each resource serves a different purpose and I will share with you the stage that each resource is best suited for based on my explanations above.
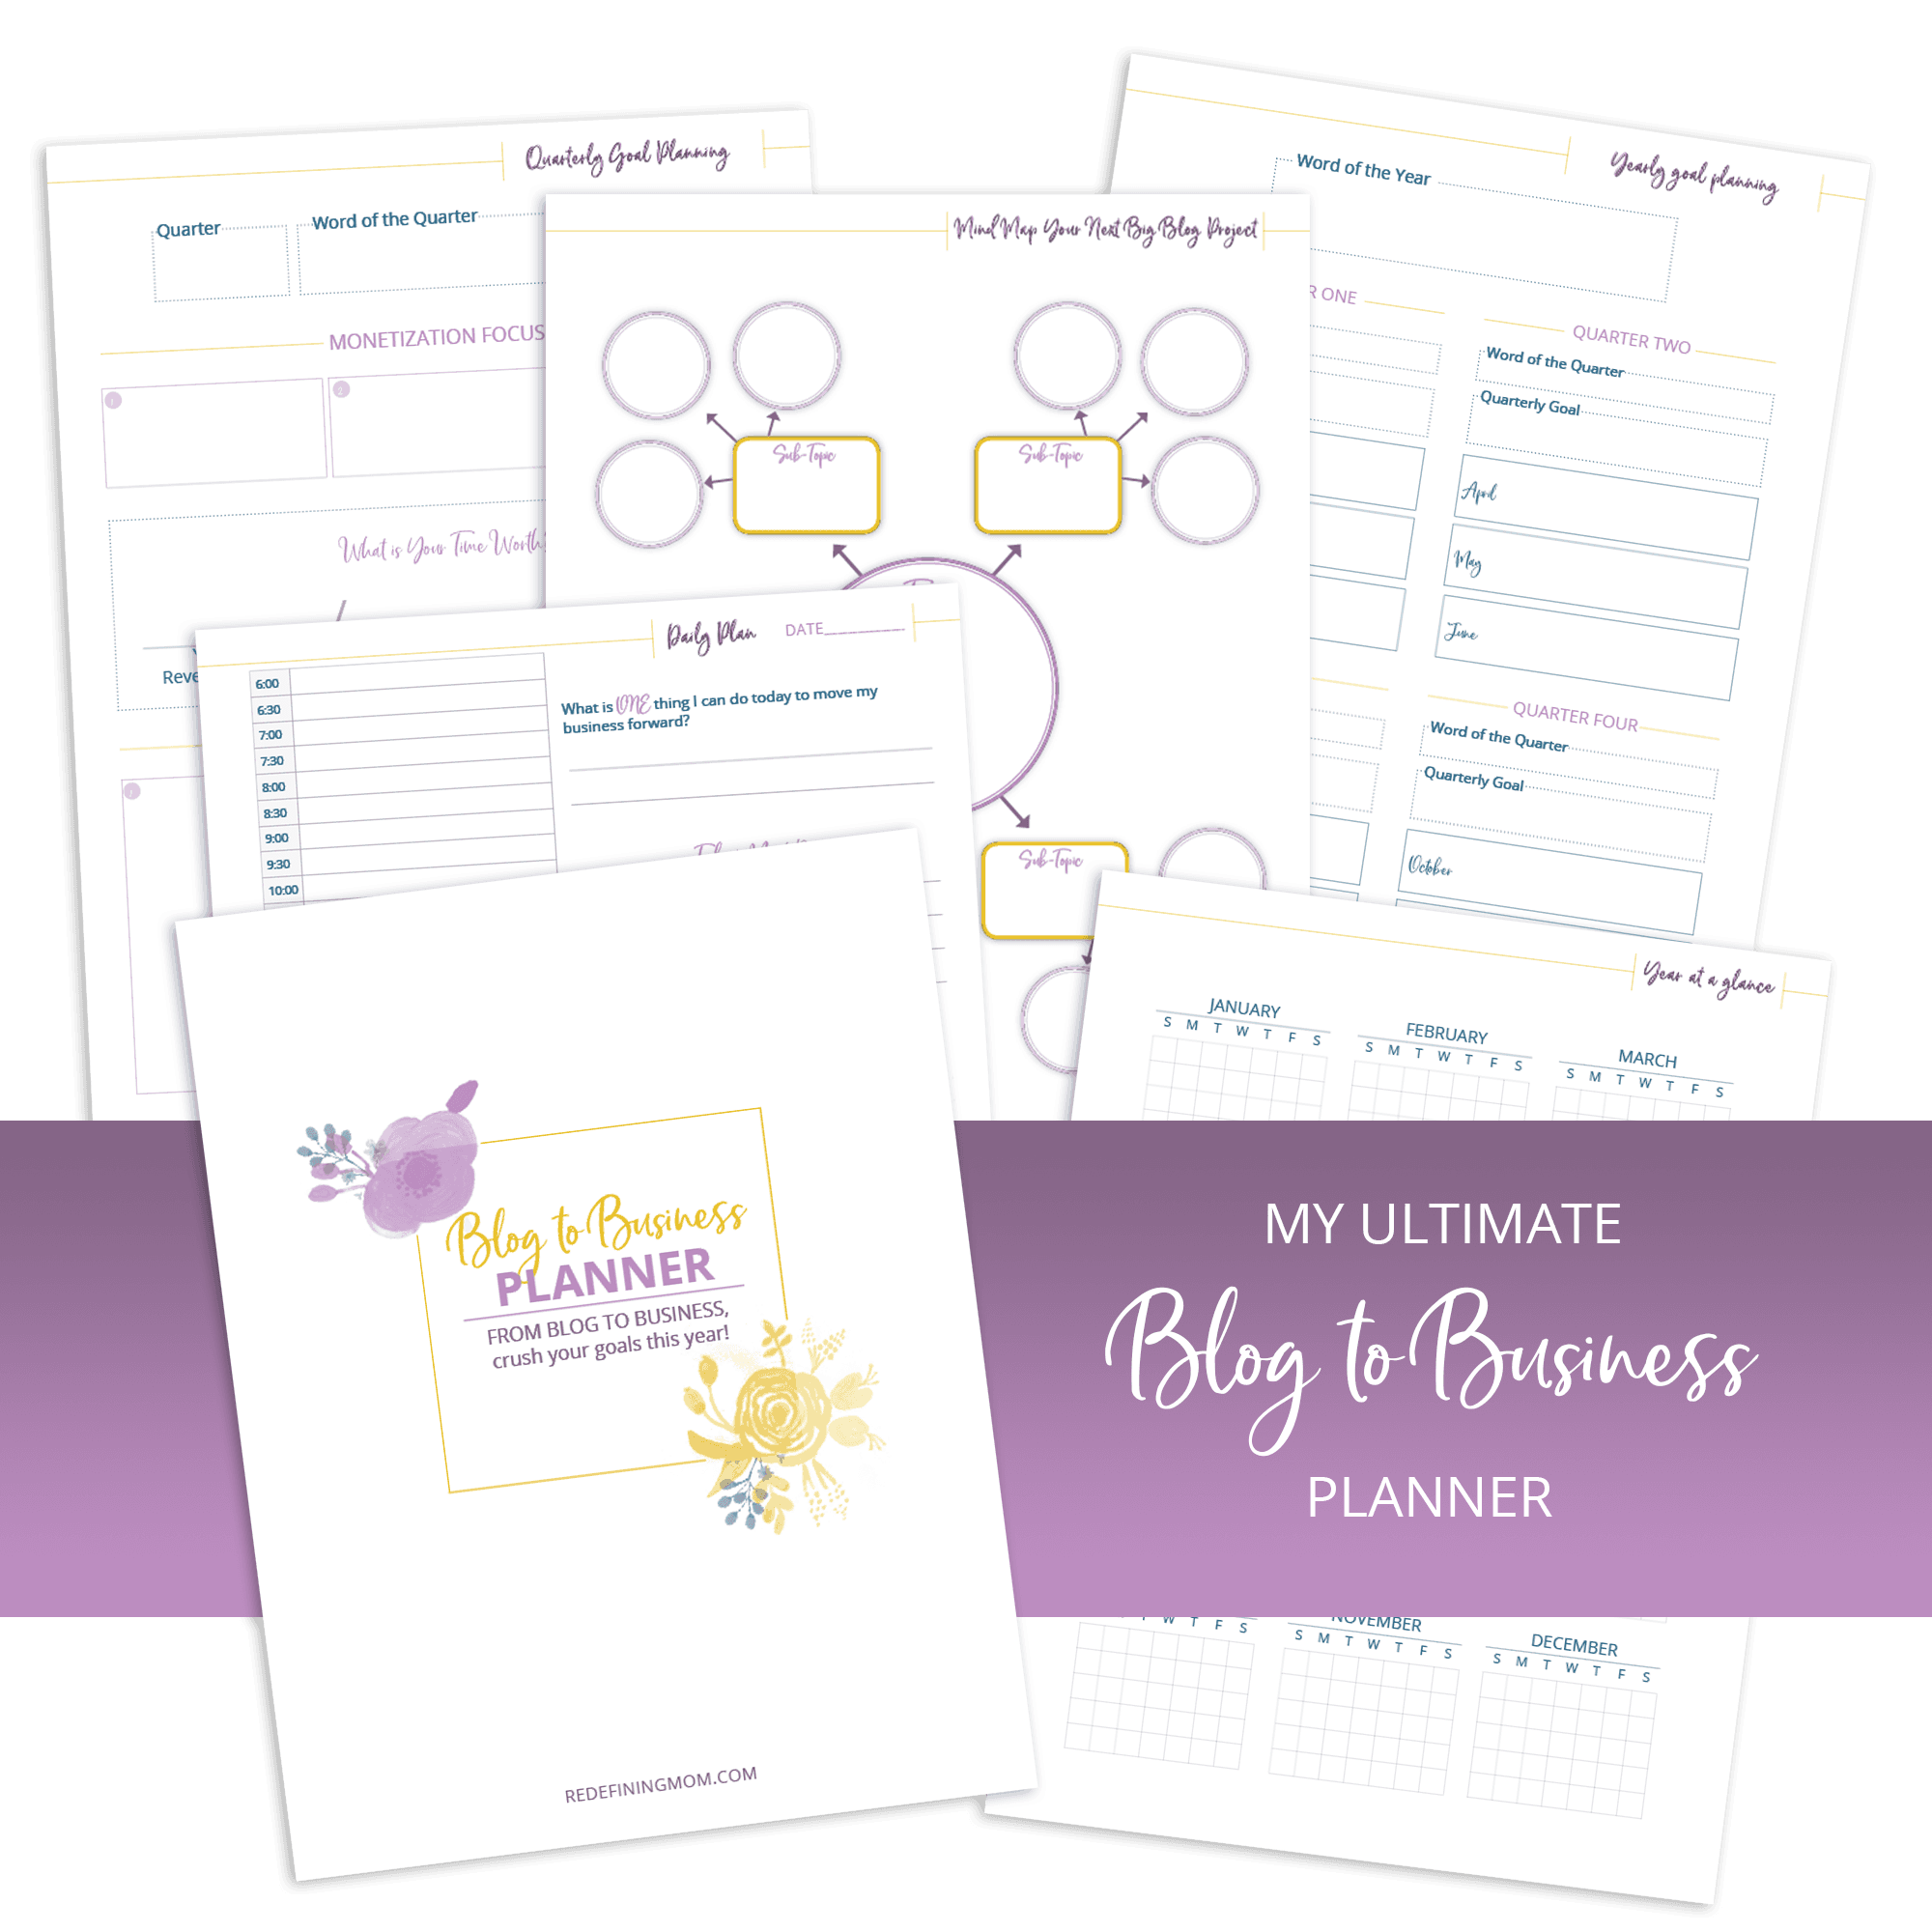
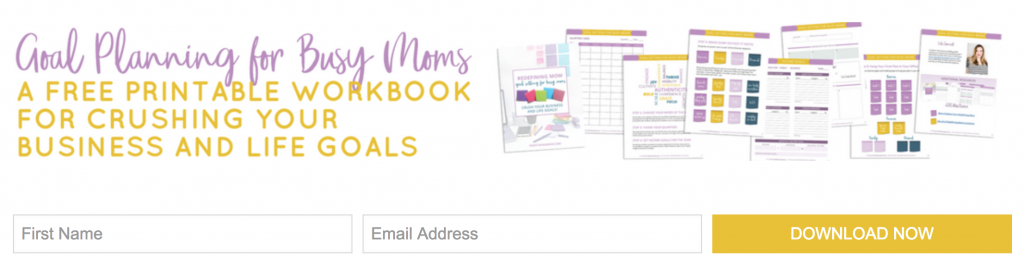
Redefining Mom’s Free Blog to Business Planner is an amazing resource for moms who are looking to turn their passion into a profitable business, created by me! This undated planner allows you to keep using it year after year.
What I love about it: I created this blog planner as a corporate mom who struggled after returning from maternity leave 3 years ago. I wanted to take my corporate skills and create my own online business so I could have the flexibility to balance work and family a little bit better. I spent the next 2 years feeling completely overwhelmed and researching endless ways to make money online, but I never actually took action. In January 2016, I quit my corporate career to work from home, and by August 2016, I built my business to the point where I could quit and be self-employed. This blog planner will help you stay organized and get you on the right track to creating a successful, money-making blog!
Recommended stages:
-
-
- ALL
-
![]()
Elite Blog Academy is a course by my favorite and very first blogger that I ever followed, Ruth Soukup of Living Well Spending Less. She is a blogging guru and her 12 unit course helps you turn your blog into a business. You can check out my review How Elite Blog Academy Helped Me Earn a Full-Time Income Online. This course is only available once a year, so be sure to get on Ruth’s email list so you don’t miss out next time it opens.
What I love about it: EBA is built as building blocks. Instead of throwing a bunch of advanced strategies at you and sending you on your way, EBA builds each concept off of the last one. EBA will lead you through 12 different units and 36 assignments. It teaches you how to be intentional with your blog so that you don’t waste time spinning your wheels.
Because EBA was built to be taken in 12 unique steps, it stops you from getting overwhelmed with too much information coming at you all at once!
Recommended stages:
-
-
- ALL
-
![]()
Pin Practical Masterclass shows you exactly how to convert your Pinterest visitors into email subscribers! In just 9 months, I grew my email list from 52 to over 14,000 for free using Pinterest…seriously!
What I love about it: I take you through 9 different strategies for converting Pinterest visitors into email subscribers. It is critical to your success in online business to have the ability to communicate with your customers. The only way to do this is to get potential customers on your email list. It is a lost opportunity to capture Pinterest traffic for 30-seconds and then lose them! Don’t let that happen to you anymore! Email subscribers = money and we’re all here to make money! 🙂
Recommended stages:
-
-
- Stage 2: growing your audience
- Stage 3: monetization
-
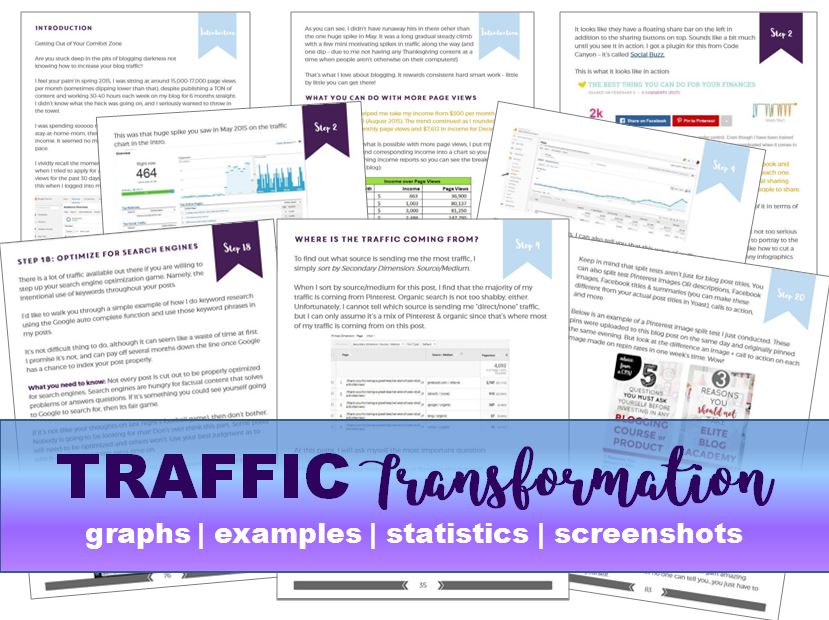
Traffic Transformation: How I Went From 17K to 400K+ Monthly Page Views in 9 Months by Lena from What Mommy Does. I had the pleasure of meeting Lena at a business mastermind event recently and when she told me about her book I read it between sessions so I could talk to her about it. This book is full of practical advice on how to grow your blog’s traffic.
What I love about it: Lena decided she was fed up with spending hours upon hours working on her blog but seeing little growth. She documents the 21 strategies she used to see explosive growth in a short period of time.
Recommended stages:
-
-
- Stage 2: growing your audience
-
Browser to Buyer is a new course offered by Abby Lawson of Just a Girl and Her Blog. Abby and her husband Donnie are experts when it comes to converting website traffic into email subscribers. The one thing I am the most passionate about in online business is growing your email list. Unlike social media, your email list is an asset in your business that you own.
What I love about it: I love how Abby and Donnie work together to leverage their strengths in this training. Abby teaches us the strategy behind growing your email list and Donnie covers tech training.
Recommended stages:
-
-
- Stage 2: growing your audience
- Stage 3: monetization
-
Stupid Simple SEO by Mike Pearson is my go-to recommendation for learning about Google Search Engine Optimization. Organic Google website traffic is the type of traffic you want. It’s more sustainable and converts into sales better.
What I love about it: This is an incredibly in-depth course that covers content that no one else talks about. It will help you make your blog is Google-friendly as possible so you can rank at the top of search results. When he says “stupid simple,” he really means it.
Recommended stages:
-
-
- Stage 3: monetization
-
My Sales Funnel Templates are what I use to explode my email list and convert sales. I have my top 6 converting funnels for sale in my shop for you to swipe and use for your business!
What I love about these: The templates are super easy to customize to your brand and products, which means you can get up and running quickly. Funnels are the cornerstone to my business, so I rely on making sure they’re as effective as possible.
Recommended stages:
-
-
- Stage 3: monetization
-

Affiliate Marketing for Bloggers is my new go-to affiliate marketing course and for the price, you really can’t beat it! Tasha takes you through the backend of her blog to show you exactly how she implements her affiliate marketing strategy. You’re not only getting the basics of affiliate marketing in this course, you’ll learn exactly how to use affiliate strategies that work for bloggers in all niches!
What I love about it: I particularly love that Tasha’s main website is not for helping bloggers learn how to blog. She uses these affiliate strategies to run a $200k/year home decor blog!
Recommended stages:
-
-
- Stage 3: monetization
-

Making Sense of Affiliate Marketing is written by Michelle of Making Sense of Cents. She makes over $50,000 A MONTH in affiliate marketing and gives away all her secrets on how to successfully make money through affiliate marketing in this course.
What I love about it: Michelle started earning over $50,000 in affiliate marketing sales in under 2 years and she shares the exact strategies she used to get there. The course is packed full of relevant information for newbie and advanced affiliate marketers. She spends 40% of the course set up the practical side such as legal disclosures and the technical aspects such as using the Pretty Link plugin to make affiliate URLs look pretty (highly recommended)! She uses the other 60% of the course to dive into exactly what she did to grow her audience and sell affiliate products effectively.
My full review: How to Earn Money with Affiliate Marketing
Recommended stages:
-
-
- Stage 3: monetization
-
![]()
Pin Practical Promotions is my next-level course on how to leverage Pinterest ads to grow your email list and make sales!
What I love about it: This is truly where you get a behind-the-scenes look into my analytic brain. I cover everything you need to know to convert Pinterest traffic into loyal customers at a low-cost to you!
Recommended stages:
-
-
- Stage 3: monetization
- Stage 4: products
-
Beginner’s Guide to Blogging: Final Thoughts
Never stop educating yourself! Once upon a time, I had no clue how to register a domain, set up hosting or what the heck WordPress meant. Blogging is a marathon, not a race. The winners are not the ones that sprint to get everything done as fast as possible. Your expertise will grow over time. The best part about blogging is that it gives you the ability to be creative and think of new ways to engage your own audience. You are doing this to grow a community that you’re passionate about, not to check a box every time you complete a task.
The to-do list you’ll create will be never-ending. The ideas and logistics of running a blog will seem endless. But let me tell you, the first time a reader sends you an email saying something you did or said made an impact in their lives, you will be hooked. There is nothing better than being able to help other people while doing something you are passionate about.
Ready? Let’s do this!
Blogging Resources
For a complete list of all the resources I recommend for running an online business, check out my Blogging and Freelancing Resource page.
Pin it!
Wow that’s one epic post. I love how you have broken down the complete post in actionable steps. I am book marking this one for my use 🙂
Thank you! Let me know if you have any questions!
Wow! This was beyond helpful! I love how you broke down each stage of blogging and which resources are appropriate for that particular stage. I am currently on Stage 2 and I have been finding an overwhelming amount of information for Stage 1. I will be pinning this to refer back to as I advance to the other stages.
Hi Paige! I am so glad you found this helpful, feel free to ask me any questions you may have!
Monica, what a great post! Thank you so much for featuring my ebook! xoxo
Whoa, this is awesome! What a truly comprehensive blog post! I am in the beginning stages of starting a blog, and hope to launch within the next few weeks, and this post really cleared up a lot of questions for me. I appreciate you linking helpful books and online courses as well. I purchased Suzi’s book and am about to hit it hard now! Thanks!
Wow…that was a lot of information. Everytime I think I have read just about everything there is to read on starting a new blog I find someone new with information I have never seen before. This qualifies no doubt. I just wish I would have found this blog first, might have saved me a lot of time and potential heartache.
As you guessed I am very new at the blogging thing and am very slowly building my blog from scratch. It has been a heck of an adventure so far. I have not made a single cent yet on my blog but I realize that may not happen for a year or two even, just hard not to get impatient when I read all the wonderful stories from others about how well they are doing. I hope that incorporating some of the things you have shared I can improve my blog and get it working even sooner.
Well thank you again for this wealth of information and hope you have a wonderful week.
The Broke Dad
Hello Monica,
This is such an awesome page for all of the blogging resources that have helped you. I appreciate your honesty about being in analysis paralysis for 2 years. I was in a similar state for many things when it came to my blog. I had a problem with using affiliate links. I didn’t want to be a salesy person. Although I don’t use affiliate links in every post, I still make a conscious effort to offer products to my readers that will help them.
Again, this is a great list. Something you would see in a freebie. Love it!
That’s amazing that you can do a small load at the same time as your larger load! What a time-saver and so convenient.
Wow, this is a goldmine of blogging info!
This is absolutely amazing! Thank you for all this info! I do have a question: I’m pretty sure EBA recommends using Bluehost as the hosting service. However, you use Siteground. Why did you decide to use something different and how did you make the decision? I am so ridiculously stuck on this step! Thanks!
Monica: Thank you for all the information and experience you’re sharing. I’ve started a Blog, I’m working right now on Evergreen articles and growing up my audience. All this information is perfect for me! I chose Pinterest to grow my audience and everything I’ve read from you is helpful!
That’s just an incredible post as well as extremely valuable. The whole step by step process showing exactly how to create a blog from start to finish! There are so many people wanting to start a blog with no idea of how to do that. Super helpful article!
Thank you so much!
Thanks, Stephen! I’m glad it was helpful for you!