
This post may contain affiliate links, which means if you purchase from one of these links I will receive a commission. Please read my full privacy policy for more information.
This quick start guide is designed to show you the tactical steps you need to take to run your first low-cost Pinterest ads campaign. The guide will prep you for the advanced Pinterest ads course I teach, Pin Practical Promotions.
Wouldn’t it be nice to have a Pinterest strategy that wasn’t at the whim of an algorithm change?
Here’s the honest truth: Pinterest is a business. They are in business to make money just like you and I. In order to be successful on Pinterest, we need to understand what makes them tick…
…advertisers.
Pinterest makes money from brands advertising on their platform. Why is this important?
Because no matter how many times Pinterest changes their algorithm, adds a new feature or takes a feature away…they will always favor paid content.
This is exactly why I created the best Pinterest ads course to teach you how Pinterest ads cost very little. Pinterest ads are scalable and you will see real results.
With Pinterest Ads…
- Most pinners report a 30% organic boost on promoted pins
- You do not pay for clicks that come from previously paid saves (repins) of your promoted pins
- There is less competition with promoted pins than other ad platforms
- You can earn low-cost clicks, email signups, and checkout conversions
- It’s your chance to be an early adopter on a relatively new ad platform
Have you ever asked yourself…
How do I Advertise on Pinterest?
Before you can get started, there are 8 foundational steps you must take to get your website ready to run promoted pins.
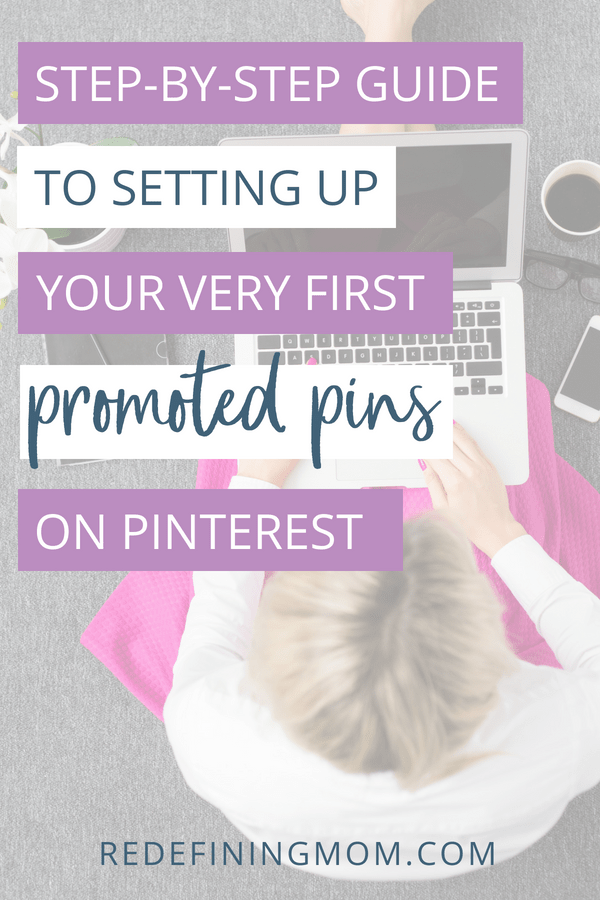
8 Quick Steps To Prepping Your Website for Pinterest Ads
Step #1: Set up a Pinterest Business Account
How do I know if I have a Pinterest business account already?
The simplest way to know if you have a business account is to log into Pinterest and check the top left-hand corner. If you have an analytics and ad button, you are good to go!

If you do not have an analytics and ads button, you do not have a Pinterest business account. The good news is that it’s very simple to switch it over to a business account.
How do I know if I should convert my personal account to a business account or just start a new business account?
Great question! Here’s the simple answer: if your personal account is a reflection of your brand, go ahead and switch it over. If your personal account does not reflect your brand, start a new account.
Step #2: Set Up Rich Pins
Rich pins give additional information about your articles to Pinterest users. Rich pins also make your article titles searchable.
Click here to validate your rich pins.
If you use Squarespace instead of Wordpress, follow these instructions to set up your rich pins.
Step #3: Set Up Your Pinterest Tag
The Pinterest Tag is equivalent to the Facebook Pixel. It’s a code you’ll install in the header of your website to track visitors. The Pinterest Tag allows you to create custom audiences to retarget website visitors in your Pinterest ad campaigns. You need the Pinterest Tag installed to track conversions from your pins such as email signups and checkout conversions.
I know this might sound overwhelming, but I promise it’s not. I recorded a video to show you exactly how to set it up:
For Squarespace users:
- Create your Pinterest Tag under Pinterest ads → conversion tracking
- Log into your Squarespace site and go to settings
- Advanced
- Code injection
- Insert your Pinterest Tag under the “header” section
For Shopify store owners:
Do you have a Shopify store? Pinterest has a built-in configuration with Pinterest to install your Pinterest Tag. I don’t personally use Shopify, so I’m providing some helpful documentation and tips for you to ensure you set up your store properly.
How do I know if my Pinterest Tag has been verified?
Once you install the Pinterest Tag on your site, you may be wondering how you’ll know if it’s verified or not.
- Navigate to Pinterest ads → conversion tracking
- Locate the Pinterest Tag you just created
- Look for “verified” under the status
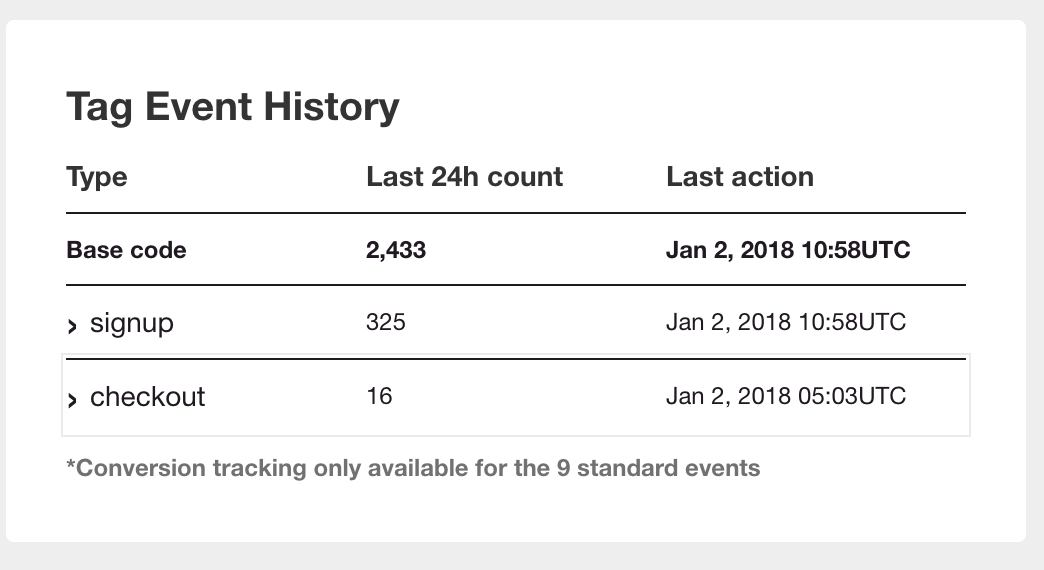
Click on “see history” to see your 24-hour tag history.
Here you will see actions in the last 24 hours on your Pinterest Tag and any event codes you’ve installed that have started to get visitors.
Tracking How Much Pinterest Ads Cost Your ROI (Return on Investment)
Step #4: Getting Started with Event Codes
Now that you’ve set up your Pinterest Tag on all the pages of your website, it’s time to take a deeper dive into how to utilize event codes to track conversions.
First, I mentioned in the Pinterest Tag video that event codes need to be placed ONLY on the page where you are tracking an action. Event codes should NOT be placed on all of your pages.
The two most common event codes you will use are:
→ Signup ← this tracks someone signing up to something with their email address on your site
→ Checkout ← this tracks when someone makes a purchase from you
In both instances, the event code for these should be placed on the dedicated thank you page for the specific action.
Step #5: How to Place Event Codes on Dedicated Thank You Pages
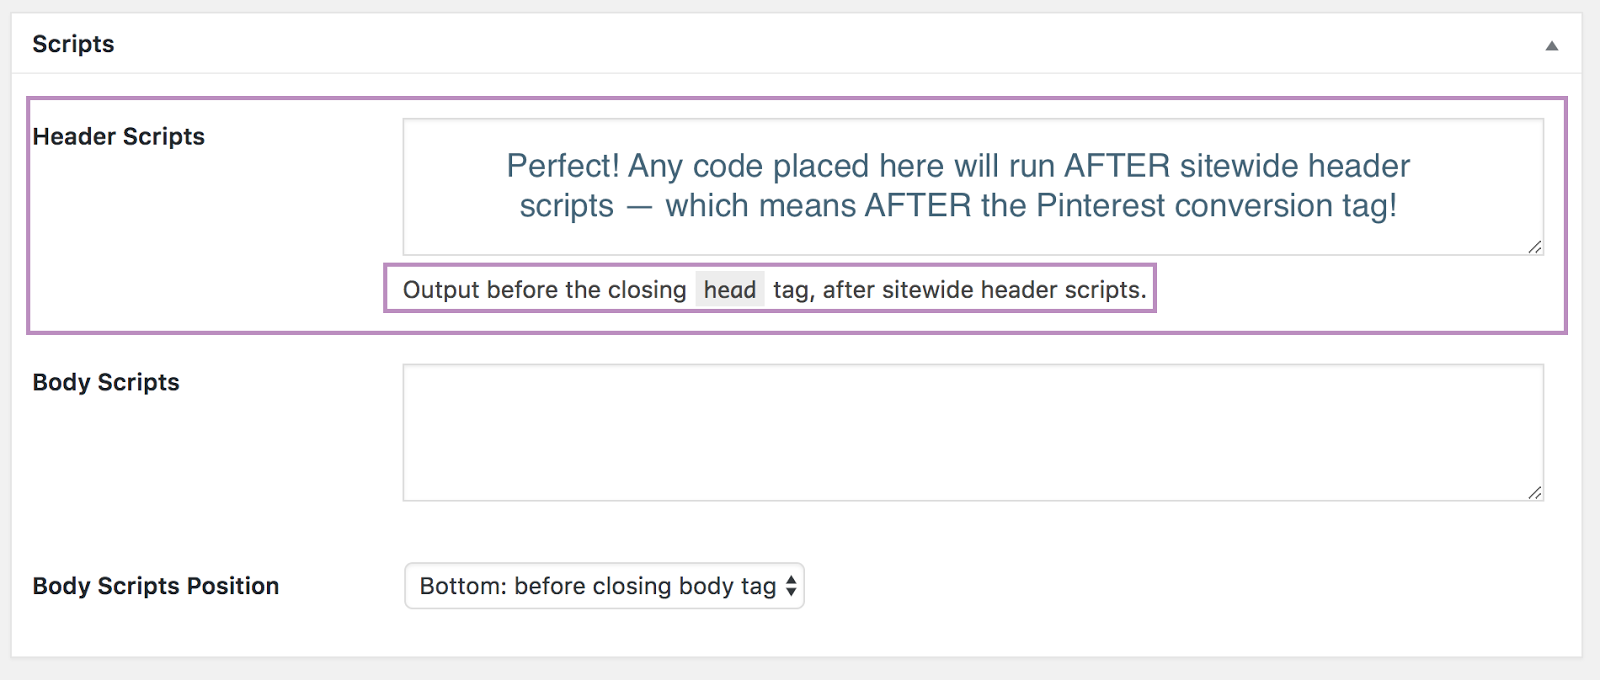
The event code must run after the conversion tag in the header script of your webpage.
LeadPages
Page tracking → Analytics → Head Section Tracking Code
WordPress
Each theme for WordPress will be different. You’ll need to find where in your specific theme you can place page-specific header scripts.
The first place to look is under the text editor for a specific page. I use the StudioPress theme, Lifestyle. Here is a screenshot of what mine looks like under each post or page on my WordPress site:
Second, if you can’t find page-specific header scripts in your theme anywhere, try Googling the answer or posting in the support forum for your theme.
Third, if you still can’t find it, try using the plugin, Pixel Your Site. This plugin costs money.
Fourth, you try the free plugin, SOGO Add Script.
Step #6: Install Your Event Code
Now that you know where you’ll be placing your code, here is the template you need to copy and paste into your page’s header script.
(bolded areas are where you will make appropriate changes)
<script>
pintrk(‘track’, ‘checkout’);
</script>
<noscript>
<img height=”1” width=”1” style=”display:none;” alt=”” src=”https://ct.pinterest.com/v3/?tid=YOUR PINTEREST CONVERSION TAG ID&event=checkout&noscript=1” />
</noscript>
There are 9 different event codes Pinterest provides for you to use. You can see a list of each event code and what they mean here: Pinterest Tag Implementation Guide.
Step #7: Thank You Pages
Thank you pages from both signups and checkouts allow you to track your conversions in the Pinterest ads dashboard. Thank you pages will be extremely important once you choose the best type of Pinterest ad to run for your business.
What if my e-commerce platform does NOT allow me to redirect purchasers to a dedicated thank you page?
This is a great question and can get tricky. The biggest reason we want a purchase to go to a dedicated thank you page is so that we can track the number of conversions.
Some payment processors and e-commerce sites, do not let you create custom thank you pages.
On my course platform, Thinkific, I cannot control the thank you page after the purchase is complete.
I can, however, still track checkout conversions. To set up the checkout conversion event code in Thinkific, go to: advanced settings → order tracking code → copy & paste your Pinterest Tag followed by the checkout event code.
SendOwl, for example, allows me to redirect customers to a custom thank you page.
If you run into this with the payment processor/e-commerce site you’re using, there are three options:
- Email support and ask for a solution — they may be able to custom code something for you.
- Use a different checkout method.
- If neither of these options works for you, I would pick a different method for optimizing promoted pins — for example, concentrate on optimizing for email sign ups or page views direct to your website instead of on a third party site like Thinkific
Step #8: Understand Pinterest Ad Guidelines
A few months ago, Pinterest came out with new and stricter ad guidelines. The guidelines were put in place to maintain quality control standards for ads on the platform. This is good news for content creators! The less spam the better. Stay within the rules and you’ll be in great shape!
Here is the complete list of Pinterest Advertising Guidelines.
A few “hot button” topics I’ve found with Pinterest Ads getting approved:
- Opt-in landing pages– Direct from Pinterest: “If you require people to take an action (like signing up) before they can see certain content, your ad should make that clear. Also, your ads can’t suggest or imply that a product is available on your landing page if you don’t actually offer that product.”
- Clear images– Direct from Pinterest: “Ads should adhere to the highest levels of editorial quality. We never allow:”
- Poorly edited images that are distracting or exaggerate
- Poorly cropped images that feel careless or recycled
- Amateur or user-generated content like selfies and screenshots
NOTE: Pinterest is not always consistent with enforcing these standards. If you feel your ad has been incorrectly rejected, follow these steps:
- Pinterest Advertising Guidelines
- Select “promoted pins for businesses”
- Select “Pinterest rejected my ad”
Phew! Now your site is ready to run your first promoted pin campaign!
The Best Pinterest Ads Course, Pin Practical Promotions!
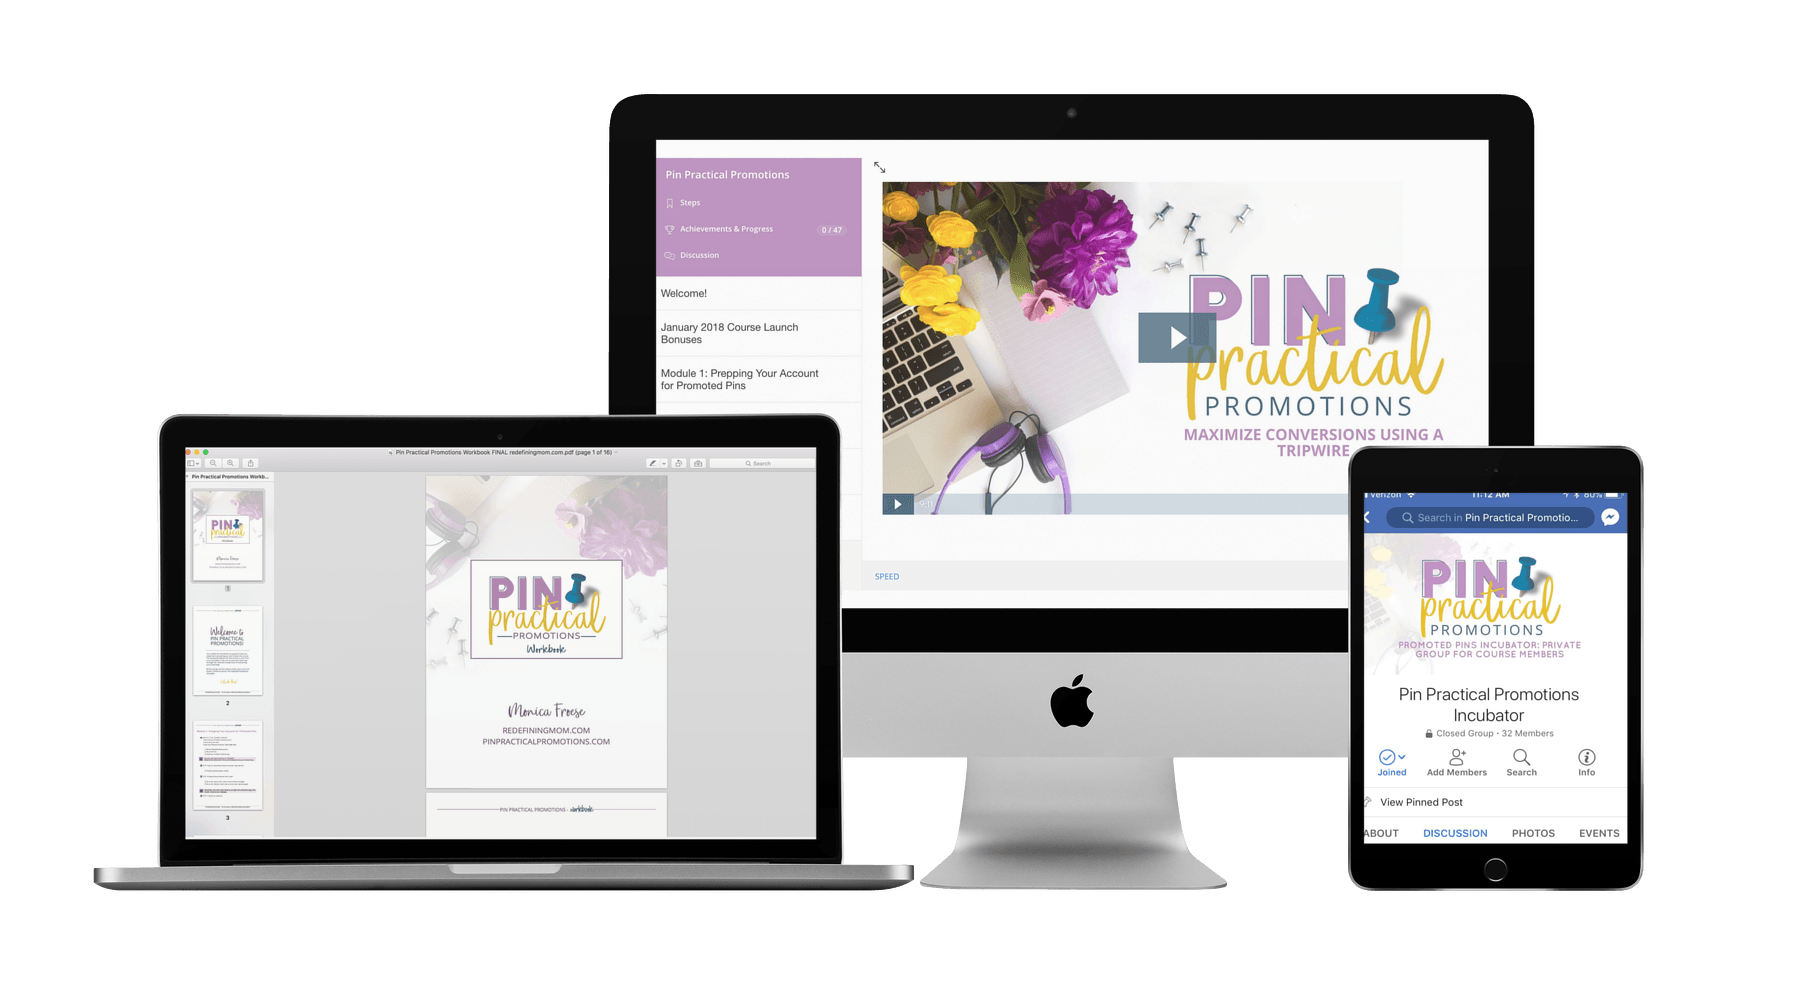
Pin Practical Promotions is my advanced-level Pinterest ads course on how to strategize, implement, analyze, and refine low-cost promoted pin campaigns. Make sure to get on the Pin Practical Promotions waiting list so you can take your promoted pin campaigns to the next level!
Your Step-By-Step Guide for Running Successful Pinterest Ads Series
Pin Practical Ads — a free training how to create the perfect low-cost Pinterest ad campaign
8 Quick Steps To Prepping Your Website for Pinterest Ads <– this post!
The Easy Way to Retarget Leads Using Pinterest Ads
The Best Types of Pinterest Ads For Driving Sales
More Pinterest Marketing Tips
7 Essential Pinterest Marketing Strategies, Everything You NEED to Know!
10 Easy Fixes to Increase Blog Traffic Fast with Pinterest
5 Steps to Creating Free Pinterest Templates in Google Slides
The Secret Behind How to Make Money on Pinterest (It will blow your mind!)
Pin It!
2 Comments